Star News


Applications from colored paper. Volumetric applications from paper Applications stencils for children
Colored paper applications have long been a traditional creative activity for children.
It allows you to develop skills in handling scissors, improve the work of children's hands and make the baby more accurate. Each child will be able to make applications from colored paper with his own hands, if he is given a feasible task.
So, the most affordable options for colored paper applications for children 4-5 years old can be as follows:

Volumetric applications from colored paper
Ladybugs. Cut out two red circles and a black semi-oval. Black dots are placed on the circles, after which one circle is glued exactly above the black semi-oval, and the second is bent in half and glued to the first circle. We supplement the insect with toy eyes and antennae.
 Materials for the application "Ladybug"
 We supplement the insect with toy eyes and antennae.
 Application "Ladybug"
 Watch the video on how to make an application " ladybug» in other technique:
Application from pieces of colored paper
Chanterelle. Cut out a triangle from a paper plate, attach two triangles of orange cardboard to its round edge with a stapler. Then cover the plate with pieces of orange thin colored paper.

Fill out the entire piece of paper.

Triangles - ears and circles - eyes
It remains only to attach round eyes - and the fox is ready!

Ice cream. In advance, we draw or cut out ice cream cups from colored paper and glue round cupcake molds to them, like creme brulee balls. With these molds, you can make other applications of dishes, if you use them as plates.
 Application "Ice cream"
 Application from colored paper according to the template
Bunny. In advance, we cut out the ears, the head and the triangular nose of the bunny according to the template, as well as the bush of grass behind which it will hide.

We collect the picture on a sheet of white paper, glue all the details and revive the hare with toy eyes.
 Application "Bunny"
 Polar bear. From white paper, according to the template, we cut out a round body, a head with ears, a muzzle and paws of a bear.

We draw the necessary details. We cover a sheet of white cardboard with blue watercolor, creating a background.

Against this background, we collect our bear and supplement it with toy eyes.
 Application "Polar Bear"
 Multi-layer applications from colored paper
As an application from colored paper for children 5-6 years old, you can use more complex, multi-layered paintings containing small details. Preschoolers may well cope with the creation of characters such as:
Fish. We cut out a triangular fragment from a disposable plate, cover the rest with “scales” - semi-oval pieces of colored paper of different colors, which need to be applied, overlapping each other a little. We attach the tail and fins with a stapler, glue the eye. Ready!

Here is another fabulous fish with colored scales.

Dragonfly. From thin paper we cut out the body of a dragonfly with a head and eight multi-colored wings.

We glue it all to a white sheet, complement the image with antennae and toy eyes.
 Application "Dragonfly"
 Application from colored paper and a disposable plate
Chicks in the nest. Glue half of a disposable paper plate to a sheet of cardboard. From blue paper we cut out three oval figurines of chicks.

We cover the figures with lumps of crumpled thin blue paper, and the nest with decorative shavings.

It remains only to glue the eyes and beaks to the chicks - and the application is ready!
 Craft "Chicks in the nest"
 In the application " autumn tree» A disposable plate serves as a backdrop.
 Application "autumn tree"
 Applications from colored paper according to a complex pattern
Girl in the rain This appliqué is based on working with complex patterns, according to which you need to cut out an umbrella, boots, head, dress, hair and hands of a girl.
 What you need to cut for the craft "Girl in the rain"
 We collect the picture on a sheet of blue cardboard, gluing the parts one by one.
 Application "Girl in the rain"
 Combined application from colored paper
Chicken with an umbrella. This application also involves working with templates, but if it is difficult for kids to cope with such a task, teachers or parents can prepare templates in advance.
 Materials for crafts "Chicken"
 We decorate the umbrella with pieces of translucent colored paper, which will make the image more interesting.

It remains only to collect the picture.
 Application "Chicken with an umbrella"
 Volume application from pieces of colored paper
Flower. We cut out the contours of a flower from a disposable plate or a sheet of cardboard.

We cut small pieces of colored paper and roll them into lumps. Glue the lumps on the glue one by one.

Carefully fill the entire space of the flower.
 Application from colored paper "Flower"
 Another option for crafts is the “sunflower”. On a sheet of paper, draw the outline of a sunflower. Cut pieces of yellow and green paper.

Glue a black circle to the center. We begin to decorate crafts with papers. Before gluing the paper, we crush it a little - this will give the craft extra volume.

Application "sunflower" from colored paper.
 Application "sunflower" from colored paper
 Rainbow. It is made in much the same way as a flower: the child crushes colored paper and neatly lays it in rows, observing the sequence of colors in the rainbow.
 Application "Rainbow"
 Very beautiful in the technique of volumetric application of colored paper is an autumn tree.

From pieces of red and pink paper, you can make an application "heart". We take a heart made of cardboard as a basis.

Slightly crush the pieces and glue them to the base. The craft will look interesting if you alternate red and pink lumps.

Great applications obtained in the technique of facing. Small pieces of paper are poured tightly against each other with a thin stick.

Here is a plane that can be folded from pieces of paper using the trimming technique.

Instead of glue, small pieces of paper can be fixed on a plasticine base.

Flat applications from pieces of paper
The application of colored paper "Christmas trees" is done in a very interesting technique. Pieces of thin tissue paper are glued onto triangular bases. In this case, the pieces can glue the edges of the Christmas trees and stick one on top of the other. Only after that the triangular base is glued onto a pre-painted background.
 Colored paper Christmas tree applique
 Straw scarecrow. The application is made using the mosaic technique. We glue the hat and head of the stuffed animal cut out according to the template to the sheet, draw the contours of the body.
 Materials for crafts "Straw Scarecrow"
 The task of the child is to fill the body with pieces of colored paper, sticking them next to each other. The same pieces yellow color we lay out the hair and beard of the stuffed animal.

Sunset. We lay out the sand and the purple sunset with pieces of yellow.


A small palm tree will complement the landscape.
 Application "Sea" from paper
 Application with quilling elements "heart"
Applications with elements of quilling or paper rolling look very impressive. In order to make an application, we need colored paper, a pencil, scissors and glue.
Cutting paper curls
We glue paper curls on a pre-prepared base - a paper heart.

We decorate curls with twisted green paper. Curls begin to look like graceful roses, framed by petals. We get an interesting application using the paper rolling technique.
Application "Vase with flowers"From colored corrugated paper and wire, you can make a very effective postcard-application "Summer Clearing". The technique of its manufacture is very unusual. We wrap several times around an easily bending rod or wire corrugated paper. We fix the end of the paper with glue.

We compress the paper on the wire. We cut off the excess part of the wire and tuck the ends. We should get colored thick sausages.
 "Sausages" from corrugated paper
 From these "sausages" we lay out the application on paper.

From colored corrugated paper, you can make a very beautiful wall panna with yellow flowers.
Application on a paper plate "bed with carrots"
Very beautiful applications are obtained if they are based on a background painted in watercolor.
 Application and drawing "spring"
 Using different techniques, and combining ideas in your own way, you can create unique paintings that will become a real manifestation of children's talent.
A popular type of needlework is colored paper crafts, which have remained relevant for many years and are constantly being improved.
More and more original approaches and variants gradually appear to them. Such an elementary and rather simple thing, like paper, can captivate both an adult and a child.

Favorably develops imagination, determination and at the same time forms the perception of colors, the development of motor skills of the child.

How much joy in the future will bring the baby to play with crafts that he made himself.

Postcards, applications, toys and a lot of interesting things can be created from simple multi-colored paper.


paper goldfish
Before starting work, you need to stock up the necessary materials:
- ruler;
- a piece of paper thick one sheet;
- plate, round shape;
- small scissors;
- colored sheets;
- glue for paper;
- simple accessories (sequins, rhinestones, beads);
- mechanical pencil.

Turning the plate over onto a thick paper sheet, outline its edges with a pencil, then cut out the resulting outline with scissors.

From the center of the circle, draw a triangle with a ruler (with an angle inside the circle), cut it - this is the mouth of the fish. Glue it as a tail on the parallel side of the mouth.

Then make an eye, paint it with a felt-tip pen, or cut it out of black paper and stick it in the right place. To decorate goldfish you need to overlay it with scales made of paper or other improvised means, sprinkle with beads, before that, smearing the base with glue.

paper flower
Interesting flowers will come out of paper of different colors. A simple set of things will come in handy:
- scissors;
- PVA glue (you can use a pencil);
- thick cardboard, it will serve as the basis for the toy;

Cut elongated strips from light paper, having previously drawn them with a ruler, then cut out circles from yellow leaf(middle of chamomile). Chopped green strips will serve as leaves for it.

Flower petals are glued from white paper strips on both sides, in the form of a loop. You can decorate a cardboard postcard with a finished chamomile.

funny butterfly
A rather interesting version of the craft is obtained using the contour of the child's hands, which is circled on colored paper. This is a great opportunity to please and captivate the child with a useful activity.

The following set of improvised materials will come in handy:
- several sheets of colored paper;
- White paper;
- small scissors;
- glue stick;
- accessories for decorating toys (colored pencils, sparkles, paints).

Having attached both palms of the child to a sheet of colored paper, carefully trace the outline with an ordinary pencil.

The result is a drawing of four palms of different colors, they will serve as the wings of the future butterfly. Glue the resulting palms (brought together) onto a sheet of white paper.

Next, you should cut out an oval from paper of any other color, which will be the body of the butterfly, glue it between the palms. It will turn out a body with wings, with the help of pencils or felt-tip pens, apply a drawing of eyes, smiles and antennae to it.

It is reasonable to smear the finished butterfly with glue, apply various decorations, rhinestones on it and sprinkle with multi-colored sequins. Such an exciting activity will appeal to the baby and will help in the development of perseverance and considerations.

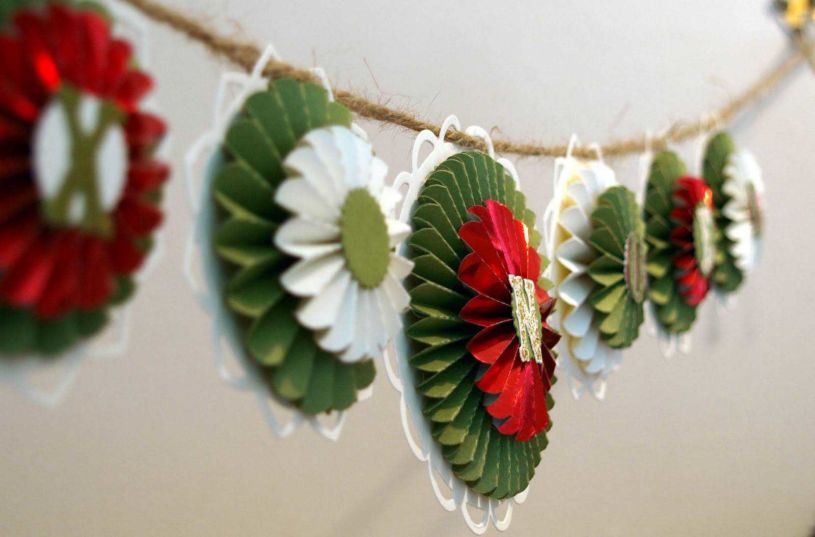
Colored curtains or Christmas garlands
This craft is the most popular and easy to make product. First you need to prepare:
- small scissors;
- paper glue;
- regular pencil;
- small ruler.
Slice a large number of strips of multi-colored paper, which should be the same size.

Glue the ring, thread the next one through it, also gluing its ends together. Perform such actions until the desired length is obtained. According to this principle, make a certain number of “strings” from colored rings.

To diversify the craft, the garland rings can be replaced with small butterflies, hearts or flowers.

It is possible to come up with a lot of different crafts self made, which provide a fun pastime and contribute to the development of the baby.
It is also always nice to receive a surprise for any holiday made by yourself, especially with children's hands!

Photo of paper applications


For the successful development of a child great importance has activities for the development of fine motor skills of hands. One of the types of such activities are colored paper applications, the templates for which are developed by methodologists, taking into account the peculiarities age groups preschoolers.
It is important that the complexity of the task corresponds to the age of the child, that the classes are carried out systematically, gradually becoming more difficult, and take place under the supervision and with the help of adults.
Paper applications- a creative process through which children learn about the world around them and acquire many skills. In addition to the development of fine motor skills of the hands, this is coordination of movements, the study of colors and their combinations, the concept of composition, acquaintance with various materials and textures, the development of observation, imagination and fantasy.
Working on the application in a team contributes to organization, endurance, accuracy. It is also necessary to note the development of spatial imagination: while doing applique, children create a whole from several components and, conversely, learn to divide the whole into parts.
Scientists have proven that in the cerebral cortex, the center responsible for fine motor skills is located next to the speech center and contributes to the development of speech skills.
Types of applications according to the template
There are three main types of applications:
- subject - the cut parts have a simple, clear shape and proportions, an image is created that is not associated with any plot;
- plot-thematic - correspondence to a certain plot (taken from a fairy tale or invented independently);
- decorative - decoration of postcards, photo frames with patterns of geometric shapes.
Simple applications for children 2-3 years old
Simple applications from colored paper using templates, you can practice from 2 years old. However, some experts believe that children from 1 year old can also perform feasible tasks.
The initial lessons are gluing pieces of paper on a sheet in any form. At this stage, the child must understand and remember the basic actions: spread, turn over, attach, smooth. The process itself attracts kids so far, they will strive for the result later.
At the second level of complexity, templates are used. The child must also place the elements randomly, but within the contour, and a certain image appears.
 Application template from colored paper "Hedgehog"
 A template is a schematic image of a future picture, drawn or printed on a printer. Simple patterns for colored paper applications can be, for example, a Christmas tree with balls, a tree with apples and others.
For such work, you need to prepare elements: balls, apples, etc. The child must determine for himself how to place them on the templates.
 Application template "Palm tree"
  Application template "Flower"
 For young children, it will be interesting to perform a simple breakaway application. The kid watches how the adult tears the paper into long strips, then he tears them into pieces. These pieces need to fill the contour. 
If the child wants to tear the paper himself, then these uneven, awkward strips can also be used to make an application, for example, grass. Ants are drawn with finger paints.
Further, the task becomes more complicated: you need to get the element to a specific place in the template or the drawn contour. So, with the help of cut out circles, an image of a caterpillar is made. At this stage, children are interested not only in the process, but also in the result. 
When making applications from colored paper using patterns and contours with children under 3 years old, prepared cut-out elements are used.
A three-year-old child can already be taught how to work with scissors with rounded ends.

At the same time, it is necessary to explain how to properly hold scissors and paper so as not to get hurt. You need to start with straight cuts, then work out the bends and roundings.
At this age, children are already able to create simple plot pictures. The elements glued onto the template allow you to create a specific image.
The background for the application can be a drawn contour with partially drawn elements. For example, children can populate a template aquarium with algae and stones at the bottom with inhabitants: fish, jellyfish, etc.
An interesting activity there may be a connection and gluing of a cut picture. If the child copes with such a task easily, it is recommended to complicate it: add raindrops to the umbrella, glue windows to the house with an attached roof. Such activities develop fantasy, observation, a sense of proportion.

Applications for children 4-5 years old
At this age, colored paper applications and patterns for them become more difficult. Preparing, together with an adult, elements for a future picture, the child shows more independence: he cuts out, selects colors and, thus, gets an idea about the composition.

This activity develops logical thinking, allows you to show creative inclinations.
For children 4-5 years old, making postcards is an exciting activity, which they then give to their parents and friends.
The base is folded in half and elements are glued inside the card, forming a plot picture.
The templates developed by experts are only examples to indicate the direction of work.
Parents and educators can contribute their ideas. For example, the use of a cut-out contour of a baby’s palm in an application - such pictures cause amazement and delight in children.
 Applications with a palm
 The application technique from one circles reveals for the child the relationship of parts and the whole.
Developing the creative imagination of the child, you should show him various tricks work with paper: for example, fold it in the form of an accordion. For such a picture, you need to prepare the base, apply the contours. The gluing process is also complicated. 
Complex applications for children 6-7 years old
Children of senior preschool and primary school age already have certain skills.
Applications from colored paper using templates during this period help to further develop fine motor skills, thinking, memory and concentration, and the ability to plan one's activities is developed.
An important circumstance is that the child foresees the final result of his work. 
At this age, children consolidate the skill of cutting out individual details and solid silhouettes, symmetrical elements from paper folded in half, as well as the ability to create compositions and correctly arrange their individual parts on the basis.
At this stage, children learn color combinations, analyze and compare details. The texture of the material also becomes diverse: in addition to ordinary colored paper, crepe (“crumpled”), highlighted (glossy), textured (embossed or imitating velvet), and foil are used.
During this period, you can move on to voluminous symmetrical compositions. 
To perform such a task, templates (clouds, Balloons) are cut in the usual way. Next, two identical templates are folded in the center and fastened together (can be sewn). Prepared elements are glued to the base.
To make a voluminous bird, the template is bent in half and glued together, except for the wings, which are bent along dotted line.
The result obtained can be glued with one side and a wing on the base (in the form of an appliqué) or turned into a craft by tying it to a thread and hanging it on a twig. 
Having learned the basics of composition at the previous stages, children of 6-7 years old are able to create whole pictures - landscapes, still lifes, using ready-made templates for applications from colored paper or making them with the help of a teacher or parents.


Applications using a disposable plate
Disposable plates are a convenient material with which you can create original and beautiful compositions. Made of polystyrene or cardboard, in different colors, with different embossed patterns, they can be both the basis for the application and the elements for it. 
Children can be involved in making applications from colored paper on a disposable plate using templates. younger age. On a prepared colored background, children have no complex elements in the form of a pattern.
A more complicated option is to use two or more colors for the background and more complex elements. Children 6-7 years old already compose thematic compositions on plates or use them as material for individual elements.
Examples of gradually becoming more complex applications on plates: 
Combined applications
When making applications from colored paper, patterns can be diversified by combining various materials.
Grain applications
This type of application can be done even with small children. The algorithm of work is as follows: an adult applies glue to the prepared drawing, the child pours grits on it and presses it lightly with his finger. 
The remaining non-glued grains must be shaken off. Such an activity brings up attentiveness and accuracy in a child.
Older children can use different types croup. In this case, the glue is applied alternately to individual sections. For the colorfulness of the picture, it is recommended to pre-tint the grits with gouache in different colors. As a template, you can take your own drawing of the child, this stimulates him, inspires him.

Button applications
To perform such an application, preliminary preparation is necessary. Having studied the drawing and choosing colors, the child, with the help of adults, selects buttons that are suitable in color and size. Then you should lay them out in a drawing to represent the desired result, and proceed with gluing. 
For younger children who do not yet possess the necessary skills, you can apply a pattern according to the template on a layer of plasticine - the child will attach the buttons by pressing. This technique is applicable when working with cereals.
For combined applications, cotton wool, napkins, eggshell, natural materials - leaves, petals, seeds and much more.
Multi-layer applications
Multi-layer (overhead) applications of colored paper or other materials are made using templates designed or made independently.
Such work develops spatial imagination, brings up aesthetic taste. They are made of paper, fabric, leather, felt - the main thing is that the edges of the material do not crumble. 
Multilayer applications, like other varieties, come in varying degrees of complexity. For little ones, this is a simple gluing of parts on top of each other. By pinning elements from only one edge, you can create a three-dimensional effect.
More complex appliqués are characterized by more detail and require good scissor skills, a sense of proportion and color.

Older children with developed fine motor skills hands with skills in making complex details create real works of art - unusual compositions and even portraits. Light and shade effects give them a special brilliance.
Multilayer application is already a truly creative process in which the imagination and artistic abilities of the child are manifested. It is necessary to think over the image, color scheme, sequence of actions, so such work implies a certain level of intelligence.
Applications from pieces
Applications from cut or torn pieces of colored paper using templates are a fairly simple look, even small children can do them. A drawing must be applied to the base sheet. In addition to ready-made templates, you can use children's coloring pages or come up with a sketch yourself.
The production of appliqué elements is carried out together with the child - small children are happy to tear the paper into pieces. If you already have scissor skills, you can allow these elements to be cut out.
Important detail: how younger child, the larger the fragments should be.

 After choosing the right colors, you can start gluing. Glue is applied not to small parts, but to the template, in sections.
When working with kids, this process is carried out by an adult, older children themselves apply glue with a brush. When gluing pieces of paper, the child must exactly fall into the contour.
A kind of appliqué from pieces is trimming. This technique is quite complicated, but for children 6-7 years old it is quite capable, especially when teamwork.
To master the technique of facing, teachers and parents are offered master classes on this topic.

Autumn themed applications
The bright colors of autumn make it possible to create colorful pictures of autumn nature. For applications on this topic, both colored paper and natural materials are used: multi-colored leaves, petals of late flowers, seeds, spikelets, twigs and other objects. 
When making applications for autumn theme from colored paper according to templates and in a free composition, the main attributes are preserved - flowers, mushrooms, fruits, acorns, silhouettes of trees are cut and painted. Mandatory component - autumn leaves.
When working with natural material you need to prepare it. The collected leaves must first be leveled and dried under pressure. If the leaf needs to be given any shape, then a fresh leaf is used for this, which is then dried.
For collages and mosaic paintings, you can prepare cardboard templates on which elements are glued. 
Autumn nature is fertile ground for the flight of children's imagination. Leaves appliqués, placed in a photo frame, will decorate any interior.
Autumn lanterns will also be a spectacular decoration. To do this, a glass vessel is glued on the outside with multi-colored leaves (paper or natural), a small candle is placed inside.
Winter themed applications
To create winter and, in particular, New Year's applications any of the described techniques is used, depending on the age of the children.
The most common type of winter applications are snowflakes - this is a subspecies of silhouette-type applications. It is recommended to fold the sheet correctly, cut off the edge and sharp corner, it is recommended to make cuts first on plain paper - this is how the skill is developed.
In addition, pendants made of such snowflakes decorate the room. Thin, airy snowflakes can be stuck on windows and other surfaces. 
For young children, it is better to prepare templates (circles with an outline) and make a broken snowflake from pieces. For flat, voluminous, multi-layered snowflakes, it is required to prepare patterns for cutting.
To make a traditional Christmas tree, kids use green paper triangles, a snowman is made from white circles, a teacher or parent helps to complete the application with details. 
Older children can be invited to make a Christmas tree from strips of paper or create a picture of a winter forest using templates using small pieces of paper or cotton wool. 
A Christmas tree made of paper balls looks bright and voluminous. For this, a template and elements are made of crepe paper. The main color is dark green, multi-colored balls are made for the garland.


An interesting application with the image of winter accessories allows children to show their creative imagination.
Hats and mittens can be decorated with any ornament, animal figurines, winter pictures, beads or rhinestones.
Cotton wool is used to imitate fur. 
Using a disposable plate, you can make a polar bear mask craft. Holes are cut out in the plate - eyes, the surface is pasted over with pieces of paper, a disposable cup is used for the nose. 
Senior preschoolers and students lower grades are able, under the guidance of adults, to create complex winter landscapes using mixed media. 
Spring themed applications
Snowdrops and lilies of the valley, starlings and flowering trees - these signs of spring are traditionally used in children's colored paper applications using templates. The smallest perform simple tasks, placing prepared elements on the contours. The same images can be complicated by adding pictures of spring nature. 
More complex compositions - voluminous, multi-layered, with a large number of elements - are created by children who have the skills to work with glue, scissors, a brush and use different techniques. 
Lilacs in a vase of cereals, a spring picture in the technique of drawing and application - these and many other ideas are offered by specialists to parents and educators for developing activities with children. 
The application is visual activity. Having achieved the desired result, the child experiences aesthetic pleasure, thereby joining the world of beauty, the world of art. A simple and accessible way for children to create artwork makes applique one of the favorite types of educational activities with children.
We make voluminous applications from paper
There are 2 ways to make a volumetric application with your own hands, and I will gladly tell you about them.
How to make volume? Method 1
Printing templates clouds and a balloon for applications, fold the paper with an accordion and cut it out.
We glue our volumetric blanks to the background. It should look something like this (only balloons will be solid):

Method 2
We draw and cut out clouds and balloons, as if we were going to do a regular paper application. And now we give volume to the details: we take two identical balls or clouds, bend them in the middle and sew them together. Like this:

Let's launch planes into the sky
Clouds and balloons are not all the paper crafts that I will talk about today. Next is the plane.

We will use the template to prepare the details for the paper appliqué.

Now let's put it all together!

small birds
You can also make birds out of paper! You can use this template.

Cut out the bird along the outline. We bend exactly in half and glue, leaving the wings. Now carefully bend the wings along the dotted line. We tie a thread, and that's it - the bird is ready to fly!

Fantasize by combining voluminous origami in unique applications or interior decorations. Here, for example, you can add not balloons or planes to the clouds, but simply a multi-colored rainbow:

Applications for children are one of the most favorite games and fun. But it is precisely by playing that the little ones learn! They are gradually mastered in the world of colors and shapes. And yet, they get satisfaction from the fact that they themselves, with their own hands, can create beauty. And if parents want to help their child, we will suggest ideas for colored paper applications.
What we can offer:
- Schemes and stencils for applications of different figures: flowers, animals, insects and fairy-tale characters.
- Let's show you how entertaining unconventional techniques applications.
- And, of course, we will give you a lot of positive! We are sure you will have fun with us!
And most importantly, all these children's applications for toddlers of different ages. And in a year the child will be interested in playing, and the more adult will enjoy this activity. Why? Because we have prepared a collection that includes applications for children with different abilities.
Who said that the plot application is difficult? Even the younger group can handle some types of applications. We will now create a beautiful basket, and there are flowers in it.

What we may need for the application:
- Colored thin paper;
- Cardboard;
- Pencil;
- Stencils;
- Glue.
- If possible, draw a basket, there is no way to draw it, then you can print it from our website. Choose the color yourself, just remember that there will be flowers on it, and she will be the background for them.


We glue the basket to a thicker paper base or to cardboard. Then our difficult voluminous paper application will hold firmly. Let's start creating.
- Cut out circles from a sheet of paper using a stencil. A stencil can be different objects: small cups, coins, round bottles, cups. We take paper bright colors, since the pictures should be colorful and joyful. Just the right kind of entertainment for 2-3 year olds, exactly what they love.

- We put a pencil on the colored part, in the middle of the circle, and wrap paper around it. In order for us to get voluminous applications, it is enough to even press the circles a little to the rod.

- Without removing the pencil, dip the middle of the future bell or orchid into the glue and press it with a pencil. You can continue, and in the very middle in the same way stick a second circle of smaller diameter to get voluminous poppies and daisies.

Hedgehog
Applications for the smallest are creativity, where the abilities of even the tiniest fidget are taken into account. And this example with a “hedgehog” is just right for little ones, which by the age of three they still cannot cut and glue, but they will do a great job of participating in the work. How?

- There are two options for preparing to make this applique for babies. First. We circle the baby's palm on a sheet of black or brown paper. Cut out. Glue. Four palms will be enough.


Second option. Or use finger paints. The child dips his palm, and we help him to put his palm in this way several times, at different inclinations in the upward direction, to make a fan. - Cut out something like a boat from paper of the same color. This is the body and nose of the hedgehog (we cut out a small circle and glue the “nose” to the edge of the muzzle).

- We place the body under the "needles".

- You can draw a mouth and an eye, or make semicircles from red and white paper. Let's not forget the pupils.


- Paper applications would be incomplete without a plot. Make up a story with your child. Our hedgehog comes from the forest, and therefore we will cut out and glue “prey” to it: an apple and a mushroom.


- We supplement the paper application with black small paws.

Ladybug voluminous
This application is perfect for children 3-4 years old. It is very easy to make.

Application execution sequence:

Flower meadow
This glade is an application in junior group for children 4 years old. It can be any size and color. And several kids can work together on it at the same time. It is important only for each of them to indicate his scope of work.

Lesson in 3 stages:

Little funny chicken
You can make holiday cards in a very original way. This will help the application in the preparatory group.

You need to cut out the following details:

chick
Toddlers think abstractly, for them such a trifle as the color or shape of a character does not matter, if at the same time his image conveys emotions similar to children's. But how to make the application just such that the baby feels a kindred spirit? Here's a great example!

Meet Chypa! Him:
- The body is a square;
- Eye - 2 circles (black and white, and white with a little more);
- The beak is a triangle;
- The paws are also triangular;
- Wing - a semicircle;
- The crest is a crescent.

And now, trust the little one, let him choose what will be what color! Explain that each figure indicates why the bird is doing this. Is it really interesting? So, finding the right stencils for applications is already a game. It remains only to glue everything!

Sun
We complicate the task. We have to help the kids learn how to make a panel application. There are many details that are both a background and an independent part of the picture. The central part is the mischievous muzzle of the smiling Sun.

Leave the smile to your kitten. Or you can print ready-made muzzles:
And do yourself the preparation of yellow, golden and orange circles of different sizes.


We collect a picture on a blue background.

You can stick circles in the form of rays, or in a circle, the main thing is to alternate their colors. The Sun itself will be placed in the middle of the panel.


Lilac
Probably, a broken appliqué is the sweetest and most gentle thing you can imagine. She just looks so fluffy that I can't believe it's all made. A torn appliqué acquires such an effect due to small uneven parts assembled into one composition.

- Background. There are 2 simple ways create it.
1) decorate the cardboard with paints;
2) or, take colored paper and glue it to a stronger base.
And you can decorate and stick from one, two or more colors.
- Vase. An arbitrary shape and color is cut out and glued to the background sheet.

- Stems and leaves. A torn appliqué will look even more openwork if you use crepe paper for secondary parts of the picture, such as leaves and stems. Cut out thin strips and small leaves. We glue the stems immediately.

- Lilac. It is very true when the inflorescences, consisting of many small flowers, are made in the style of a broken appliqué. This will make it possible to depict flowers more realistically. First, we determine the shape and size of the inflorescences. We cut out the silhouette of each of them from a colored napkin. Attach above the stem.

Cut the napkins into small squares. We crumple some of them. Others - tear into several parts before crumple. This is a material for crafts in the format of a broken appliqué.

Lubricate the silhouette of the inflorescences with glue. We press each lump to the silhouette, tightly gathering one to the other, so that there is no gap between them.


Bouquet
These are not just flowers, but a structure that will stand. In this case, we will make all parts of the plant. Flowers, leaves and stems. This simple application middle group kids will get used to it very quickly.

- We fold the green leaf in half so that its colored part is outside. Edge to edge. We fix them. It is very important not to bend too much, just run your hand slightly in the middle.


- Now you can make cuts from the middle to the edges of the sheet, not reaching the edge of about 1.5-2 cm.

- We turn the sheet into a tube and fasten its corners one to the other at the bottom. It turns out a stable construction. We slightly push the “petals” of the bouquet at the top.


- It will not be difficult to cut flowers of different colors. They are cutely decorated with the middle, which can be made round, heart-shaped, and even triangular or square.

- We attach the flowers to the edges of the stems at the top. The bouquet is ready, you can give it!

Snowman
we did with you Greeting Cards, an invitation to a celebration, paintings and even a memory of your little one's childhood. But now we will try to make a Christmas tree toy.

And since it consists of two bases and 16 circles, we print out templates for applications, this will allow you to quickly, and not linger on preparatory work, go to the design of the toy.
More about preparations. The base is 2 circles of the same size, drawn with a figure eight. Additional circles are equal in diameter to those in the base.
We also need a rope 4 times the length of the base. and decorative beads.

glade
Glade is a multi-composition application in kindergarten for children 5-6 years old. Here we will get acquainted with the models that must first be made, and only then fixed on the basis. Volumetric types of applications are made in such an original pattern.

Our base is blue cardboard. This is the sky. The sun is shining. Grass grows in which flowers bloom. And above them flutter butterflies and dragonflies. All parts are made of paper folded into an accordion.
- Grass. We fold a strip 5 cm wide and 2 times longer than the bottom of the base with an accordion. Cut off the top (approx. 1 cm) at an acute angle. Glue the strip.

- Flower. We fold a long strip 3-5 cm wide and turn it around in a circle so as to connect the edges. We fix them. The flower is ready. We make several of these products in different colors.


Do not forget about the stems (glued strips) and leaves (harmonicas in half).
- Butterfly. Cut off and round the edges of a sheet of paper. Fold across into an accordion. We do the same with the sheet. smaller size and another color.


We connect 2 sheets in the middle with a strip. We fix them. Straighten the wings.

- Sun. Glue the top corner with a yellow triangle. We fasten a corrugated strip along its edge, we get rays.
- Dragonfly. We cut out 2 blanks from a simple sheet. One in the form of a figure eight, the second - a droplet. We glue a droplet to the base and a number eight next to it so that corrugated wings fastened in the middle are placed between its circles.
- The glade came to life and blossomed to the delight of the children.

Piggy bank of master classes on applications + interesting ideas


It is nice to know that the different types of appliqués made by children, such as appliqués made from torn paper, or from corrugated material, good memory. Yes, and irrefutable evidence that our little ones have talent. The child is developing. And in this we help him.


Templates


