Star News


")


We make goldfish. Paper fish. Videos master class
Many crafts available for toddlers kindergarten, they are performed in different techniques. This develops the imagination of the children well; you can decorate a wall, cabinet or shelf with crafts. Consider the easiest ways to make a fish out of paper, plastic caps, CDs, origami, etc. You can start modeling fish from dough and plasticine.
Application
Fish from colored paper, paper molds for cupcakes. Cardboard, multi-colored paper, even colored paper cups for cupcakes or sweets are suitable for work.

Master class on making fish with your own hands:
To make a beautiful aquarium of several fish, you need to take a blue sheet of A4 paper. According to the size of multi-colored wrappers, we cut out small triangles (tails for fish) from colored paper, matching the color of our future fish.

First, glue the triangle-tail, on it - a round corrugated candy wrapper. The fish should swim at different heights slightly at an angle, but without touching in the aquarium (leaf).

To look like real fish, you need to glue toy eyes. We paint with a black felt-tip pen (marker) the eyes and the mouth in a semicircle, as shown in the figure.


Air bubbles from sequins or confetti circles look very realistic (punch a hole punch from a bright postcard). Circles of bubbles are well glued from each fish upwards.

Our aquarium is ready!

plasticine fish
Children love to sculpt from plasticine, you can choose any fish.

Prepare for work:
- plasticine 1 color;
- small scissors with rounded ends;
- plastic knife;
- clear nail polish.

You can even take 1 color of plasticine, for example, orange. To obtain goldfish, you need to add a little acrylic paint to the plasticine.


Stages of work:
We take a piece of plasticine, roll up the “sausage”, cut off 1/3 with a plastic knife. The smaller piece is divided into 2 equal parts. They will go on the fins of the fish, and the big one on the body. We take a small piece of plasticine, first we need to roll up a “droplet”, then flatten it with the side of a knife.

Use scissors to cut out a beautiful curved tail of the fish, as shown in the picture. To decorate with a knife, draw long diverging lines along the tail. From the 2nd piece you need to make fins: 1 large and 2 very small ones. We repeat the technique, as on the tail.

We return to a large piece of plasticine, roll up a round ball. Then we draw scales on it with a knife - small semicircles in a checkerboard pattern, as in the figure.

Now, to the base (ball), you need to attach the vertical rear large fin, then the top and 2 small fins at the bottom on the sides. For the eyes, roll up small balls of 2 of each color: white ones are larger than the rest, green (blue) are slightly smaller, black are even smaller.

Then flatten the white balls and attach to our fish from the center to the left, the other to the right. The eyes should be large, touching in the center.


On top of the white circles we attach flattened green circles from the center to the sides. Then flattened black circles on top. It turned out voluminous eyes of 3 colors. On the sides of the black circles, we sculpt 2 small white circles on each side, as shown in the figure. Below the eye we make a semicircle - a smile.

Can colorless varnish(for nails or acrylic) paint the eyes completely. They will shine beautifully and become more durable. Leave the craft for 15-20 minutes, the varnish should dry.

Later, you can place the "gold" fish among the beads, colored plastic balls and algae in a symbolic aquarium in a container or on a flat surface.

Plasticine crafts can be taken into the water to play, it is durable and will retain its original appearance.

origami fish
The ancient art of origami from China has spread all over the world. Translated from Japanese as "folded paper". Let's consider the simplest way.


We will need:
- two-color (color) paper 2 A4 sheets of different colors (for example, orange and pale pink);
- simple pencil;
- ruler.


Step-by-step instructions on how to make a fish craft:
It is better to take two-color paper specifically for origami or color paper from 2 sides. We cut out a square 20 x 20 cm. Diagonally, the square must be bent, we get a triangle with a right angle of 90 degrees.

Turn the wide base up. We divide the sides approximately in half and bend the corners to the center, we get a rhombus. In the upper part, you need to bend the corners up, connecting them into a small triangle, as shown in the diagram. The resulting corners at the top of the rhombus must be bent at an angle of 20 degrees. So the ends of the bent corners protrude slightly beyond the limits of our workpiece.

The lower part of the rhombus. Divide the lower triangle by eye into 2 equal halves, mark with a pencil horizontally. Cut out the 2nd square from another paper and apply it to the bottom corner, as in the diagram.

Now the bottom part of 2 sheets. It is necessary to bend the upper corner of 1 sheet along the diagonal of a common rhombus. So the bottom of the diamond will overlap upper part. The remaining half of the upper part must be bent to the central common line. In a rhombus, the lower part must be bent back.

At the bottom of the rhombus, a “pocket” is obtained. If you press the craft a little, the pocket unfolds. Now we turn it 90 degrees, and bend it so as to move the fold lines, again getting a rhombus, as in the diagram.

In the rhombus, we divide the left half into 4 identical parts, fold 1 of them, then unbend and return the pocket to its original position, as it was according to paragraph 10 (see diagram). Then you need to unbend the back to get a square, and 2 corners will peek out from the back.

Next, you need to cut the square to the fold, which was obtained in the previous paragraph. Now we need to return to item 11, ¼ part must be bent inward. Now the back part can be slowly pulled out to get the tail of the fish. Now it remains only to decorate our product. We glue an eye on a two-color fish, it turns out very realistic.

Now you know different techniques how to make a fish out of paper, plasticine, origami. With a little imagination, make different sizes colored fish, they will be different and will create a flock in an aquarium or on cardboard.

Don't be afraid to experiment, be creative! We offer original photos fish crafts.

Photo crafts fish


One of the most exciting activities is the creation of small masterpieces from the most simple materials, for example, paper. In particular, children like it when something unusual and interesting turns out of something ordinary. How to make a fish out of paper? detailed instructions will help you deal with it easily.
The simplest fish
Let's start by folding a square piece of paper diagonally on both sides and in half horizontally. Then you need to iron the folds well and turn it back. After that, we connect the points along the edges of the horizontal fold so that we get a triangle.

Now pinch the lower left corner of the triangle and fold it towards the center along the diagonal crease. Do the same with the other corner - we got a fish tail. Make and glue eyes, draw a mouth - and that's it, the inhabitant of the deep sea is ready.

This is probably the most simple instruction, which will teach how to make a fish out of paper with your own hands, even the smallest. Incredibly cute small project perfect for sharing leisure time with your children, and by making several fish of different colors and sizes, you can even create a nice application to decorate the walls in the children's room.
Making voluminous fish out of paper
For work you will need: one piece of thick one-color paper, one piece of thick paper in a different color, white paper (for the eyes), scissors, glue or tape and a marker.

Steps:
1. Take a sheet of paper.
2. Fold the bottom right corner up to form a triangle.
3. Trim off excess.
4. Fold the sheet diagonally so that the crease runs from the top left corner to the bottom right.
5. Bend the lower left corner to the center.
6. Bend the upper right corner to the center.
7. Iron the folds well and unfold the sheet.

8. Fold the square along the center diagonal crease.
9. Take scissors and make a few cuts (about 20) without crossing the two side creases.
10. Expand the square.
11. Take a glue stick and spread it on one of the side triangles to the crease.
12. Glue the two sides by placing two triangles on top of each other.

To get the head of the fish, you need to cut off the lower left corner. Use contrasting colors to cut out the fins and tail. Decorate them with stripes using a marker. Take white paper and cut out the eyes. Glue them on the head of the fish, after drawing the pupils with a marker.

Glue on the tail and fins.
It was a master class on how to make a goldfish out of paper in a three-dimensional version. It can be used for children's games, and you can also decorate a room with it.
Complex origami fish
To try yourself in more complex things, it’s better to first learn how to make a fish, an airplane, a boat out of paper in simpler variations. Success at the initial stage will stimulate further advanced training in paper art.

Having trained well, you can learn how to make a fish out of paper with more complex elements - fins and a tail. Numerous manipulations to obtain a sufficient number of folds require time and patience.

And only hard work, perseverance and readiness for the fact that not everything will immediately turn out smoothly and accurately will lead to a brilliant result. Only then will a real miracle happen: a simple sheet of paper turns into something fabulous and incredible.

Origami is a true art
How to make a fish, a cat, a bunny out of paper? Nothing is impossible. The art of folding paper without the use of glue or scissors originated in Japan a long time ago. Now it is one of the most popular types of needlework, which has gained recognition all over the world.
With the help of simple materials, you can simulate a cobweb and make original toys, flowers and much more. Put a little effort and imagination, and you will get a great result!
You will need:
1. Silicate stationery glue in a plastic bottle.
2. Spool(s) of white (optionally colored) thread? 40-60.
3. Glass jar for spools of thread.
4. Scissors.
5. Thick and long needle.
6. Balloon (preferably a fingertip).
7. PVA glue for gluing parts.
8. colored paper for the manufacture of parts according to patterns.
Operating procedure:
#
inflate balloon about the size of an apple, tie it well, cut the ends of the thread.
#
Put the spool in a glass jar so that the thread from it unwinds easily and freely.
#
Pass the end of the thread into the needle and pierce the bottle with silicate glue with it, then the needle can be wiped off and removed until it is no longer needed.
#
Pull the thread a few times different sides, check whether it easily passes through punctures in the bottle.
#
Then take in left hand a balloon and, slowly, wrap it with a thread soaked in glue - this is how a cocoon is made.
#
If you use the full coil, the cocoon will be too frequent. How less thread, the lighter and more openwork it is. Two very beautiful cocoons can come out of one coil.
#
Wet cocoon should be put to dry on oilcloth away from heating appliances. It will be ready in about 4 hours.
#
If the drying cocoon crackles, it means that air comes out of the ball and the cocoon will not be rigid enough, which in turn will affect the quality of the product.
#
When the cocoon dries, you need to pull out the balloon from it. Carefully pierce it with a needle and pull it out through the cell in the bottom wall. If you still need a balloon for one item, carefully untie the thread and release the air.
You have in your hands a weightless openwork product made of a magic cobweb.
In order to make such a charming goldfish, you need to make an oval cocoon of white thread. To do this, take a fingertip, inflate it harder and tie it tightly with a thread. Next, using the technique already familiar to you, make a cocoon of white threads, and while the cocoon dries, prepare the rest of the details. It is best to make them from colored foil, but colored paper can also be used.
The eye is assembled from three parts - yellow, red and black. The parts should be cut out, put on top of each other and connected with droplets of PVA glue.
The tail is also assembled from three parts - two on the sides (identical) and one in the middle. Attach the side parts to the paper circle for the valves towards each other. In the middle between them, pour in the middle part of the tail.
Crown. Cut the flap on the crown with a fringe and fold it inward. Then close the crown into a ring and glue the edges.
Mouth and lower fins. Cut out these parts, bend the valves.
Dorsal. Cut out the fin scan, bend it in the middle along the fold lines. Then, before gluing the fin, attach it to the back of the goldfish - to the cocoon itself. To do this, tie a long thread to the top of the cocoon in the middle. Pierce the open dorsal fin in the middle and, passing a thread through the hole, connect it to the cocoon. Lubricate the bottom of the fin with glue and glue it to the cocoon. Then lift up the edges of the fin and glue them together.
Assembly should be carried out only after the cocoon has completely dried.
Glue the eyes, mouth and lower fins (for the valves) onto the cocoon with the dorsal fin. On the crown, glue the valve bent inward with glue and press firmly against the head. Lastly, glue the tail assembled on the mug (press the circle smeared with glue to the cocoon). Hang the finished fish by the thread released from the upper fin.
Pattern 
How to make an origami fish?
Do-it-yourself (large) goldfish
Quilling fish - master class
How to make a goldfish :: what can you make a fish out of paper :: Hand-made
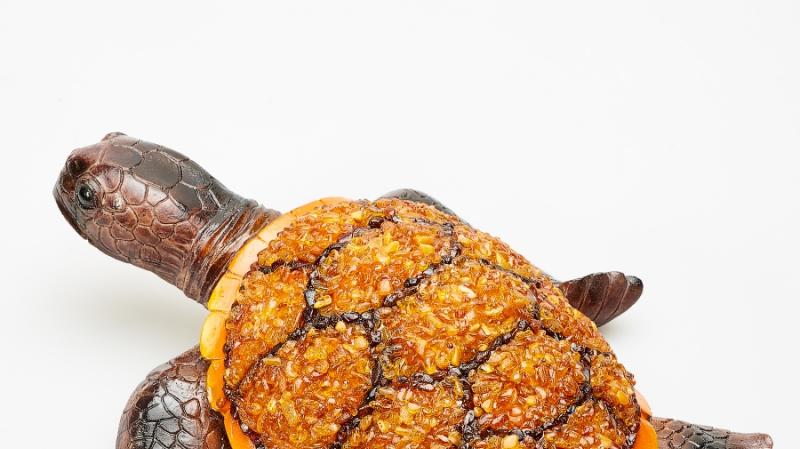
Golden small fish can be made from different material. The main thing is that it should be shiny, with a "fluffy" tail and fins. You can "plant" it in a small aquarium or a large glass with pebbles.
The question "what happens if you drink hydrogen peroxide?" - 1 answer
Instruction
1. Do small fish plasticine - yellow or brown. Blind an oblong shape, mark the gills with a knife. Sprinkle the mold with beaten Christmas decorations. Make eyes, for example, from black peppercorns. The tail and fins are made of bright feathers. Cat toys on a stick are very good for this purpose.
2. Make it golden small fish from two sheets of thick paper or oval-shaped cardboard. Cut to give a bulge, and connect the sheets together. Stick shiny foil on the sheets golden color. You can add other colors. From the same material, cut out wide simple or curly stripes, and glue the fins and tail. Draw eyes with a disc marker.
3. If you know how to sew, take a piece of shiny material and sew an oval or round bag. Stuff it with foam rubber or fabric scraps. Make button eyes. Make the tail and fins from feathers or from the same shiny material.
4. Tie the gold small fish from a thread with lurex.
Related videos
Helpful advice
If you want to give a gift to a child, do not use broken glass and other material that can injure the baby. A knitted or sewn toy is best.

How often, giving a birthday present, we wish him that all wishes come true. If, in addition to the main gift, you present a bouquet of sweets in the form of a fabulous goldfish, then your wishes will surely come true! After all, it is not for nothing that this character from a fairy tale known to everyone since childhood is associated with fulfilled cherished dreams. In this master class, we will describe step by step how to make a goldfish out of sweets with our own hands. This craft is sure to be appreciated.
We will need:
- chocolates in the form of coins;
- corrugated paper;
- organza;
- Styrofoam;
- stand (you can use a pallet from a flower pot);
- skewers;
- glue;
- tapes;
- beads.

As the scales of a goldfish, you can use not only chocolate coins. If you find round candies in a golden wrapper, then they can also be used to create this craft. Just attach them to the base with hot glue. Other sweets that can decorate the base of the craft will not be superfluous. In general, it all depends on your imagination and desire to give a loved one a lot of positive emotions.
You can also make other crafts-gifts from sweets, for example, a shoe.
Tatyana Bezmenova
This year turned out to be a cold, uncomfortable May, at least its first half, but thoughts of a sunny, and I hope warm, summer warm my soul. Summer is probably the most favorite period for many teachers, and primarily because it is the time for holidays, when you can have a good rest, gain strength for the whole year. A great vacation at sea, I think many will agree with me, plus everything from there you can bring excellent material for creativity, such as a shell and pebbles.
Every year I go to my native places, to the Kuban, I definitely go to the sea, and stock up on this excellent natural material. Today I want to offer a composition master class, where these marine “souvenirs” came in handy.
The master class will be of interest to teachers working with children of all age groups. Kids will perfectly cope with such a task, they will be able to make a fish on their own, and older children will be interested in not only making a fish, but also compiling a similar composition.
Appointment.
Interior decoration. Present.
Target.
Making the composition "Goldfish" with your own hands.
Tasks.
Develop children's imagination fine motor skills fingers
To improve the creative skills of children, the ability to work with small material
Build perseverance and patience
Materials. Disposable spoons, sequins, plasticine, disposable plastic board (can be replaced with disposable plates), shiny corrugated paper, stones, shell.
Description of work.
We break off the handle of a disposable spoon, remove it, we will not need it. We cover what is left with a layer of plasticine, and apply sequins on top - this will turn out the body of a goldfish. Coming from shiny corrugated paper cut off a 5x5 cm square and make a tail, slightly crushing on one side. We attach the tail to the body with plasticine. We also make fins.
Now we proceed to the design of the "seabed". For this we need a small plastic cutting board. We spread stones, shells on it, we also fasten everything with the help of plasticine (it will be easy and safe for children to work with it) Add grass. And of course the central figure of our composition is a goldfish.
Babies can be given a ready-made background, which can be purchased in specialized stores, it is quite inexpensive. The work will look impressive, and I think it will please the children with its realism, create the illusion of a real seabed, where the goldfish will really like to settle.


Related publications:
Symbol of the New Year "Rooster". How many interesting crafts(petushkov) are brought to our attention by colleagues. To decorate our group New Year's party.
Psychologists say that in order to understand a child, you need to learn to see the world through the eyes of children, and this is not easy. No, not because they are children.
Purpose: to develop the ability of children to create paintings from plasticine. Tasks: to develop Creative skills children, develop a sense of shape and.
Pointillism is a unique trend in painting, which, translated from French means "to write in dots". Drawing important.
Plan: 1. Seminar "Testoplasty for babies" (the potential of testoplasty for the development of children, the advantages of the test over other plastic materials,.
Master class "Fulfill my three wishes, Goldfish!" Dear colleagues! Somehow we did with the guys performing goldfish.
1) to make a fish, we need: a glue gun, a ribbon for tying flowers (golden and yellow, pink, as well as blue,.