Star News


")


Undersea world. Abstract of the lesson on the application. Collective work "Underwater world Layout on the theme of the water world
Please your child with the news about his own aquarium and that he can make it himself. DIY craft underwater world will plunge you into the kingdom of marine life and help identify Creative skills children. We offer to make a home aquarium from an old box that was left from under the shoes. Don't forget about marine animals, which are easy to make with your own hands from cardboard or plastic plates.

Water world materials:
- shoe box
— decorative wrapping paper;
- a set of colored paper;
- cardboard;
- scissors;
- PVA glue;
- needle and thread of blue color;
- beads of blue or green colors;
- shells from the sea;
- paints;
- brushes.
Also read: DIY Origami Fish
DIY craft: Underwater world
We make crafts the underwater world or a home aquarium with our own hands.
1. To give an aesthetic appearance to the box, glue it on the outside with decorative paper.
2. Now let's deal with the inside of the box. We glue the top and sides with blue colored paper, and the bottom with yellow. It turns out the sea and the sandy bottom. If the box inside is white, then you can paint over it using the same colors as when pasting over.

3. Then glue the shells to the bottom of the sea. If there are no shells, then draw them with paints. You can also glue small stones. If desired, paint over the shells and pebbles in any color, giving a magical look to the seabed.
4. Cut out algae from green colored paper and also glue them to the seabed. You can use green rain as algae or dry twigs from trees that need to be glued to the bottom and also painted green.

5. Cut out fish, octopus, crab, seahorse and jellyfish from cardboard. Or any other inhabitants of the deep sea.
6. Now we decorate them on both sides. We draw eyes, a mouth, scales for those who have it. Use bright colors to make the fish appear alive. Let the blanks dry.
7. We carefully make holes in the upper parts of the blanks and hang them at different heights of the box, fixing the thread with tape on the opposite side from the seabed. Make bubbles for a few fish. To do this, pull the thread through the blue beads and then fix the fish to the box.
The underwater world craft can be put on a shelf so that it creates the feeling of your own aquarium. Give the child the task of replenishing the aquarium with new fish, but already bigger size, then you get the illusion of the growth of the inhabitants.
You can see all the crafts of our site in the "Do-it-yourself catalog"
Nadezhda Akimova
Abstract of the lesson on the application. Teamwork"Undersea world"
« Underwater world» .
Tasks:
To teach children to make up from sculpted and carved figures collective composition;
Continue to teach children to independently and creatively reflect their ideas about nature;
To teach children to independently choose art materials for the disclosure of the chosen topic;
Activate different techniques for creating beautiful aquatic plants (twisting, twisting, decorating flagella and ribbons)
Develop the ability to shape and plot.
Cultivate an aesthetic attitude towards nature.
preliminary Job:
View: photographs, illustrations, postcards with the image of fish, to enrich the artistic impression of children.
Preparing the basis for collective composition« Undersea world»
Conversation about different reservoirs (lake, river, sea).
Acquaintance with seascapes. Wave drawing. Image of waves on the sand.
Experiments with water.
Materials, tools, equipment.
Synthetic material - fabric(tinted in blue, colored textured paper, terry and woolen threads of different colors, scissors for cutting fish silhouettes, beads, small buttons, beads, a simple pencil, glue, glue brushes, napkins, oilcloths, boxes for scraps, unfinished composition for teamwork.
Lesson progress:
Children look at slides that introduce underwater world, and invites you to close your eyes to imagine a marine jungle of beautiful, dense algae. Listen to the sound of the sea. Droplet reads a poem Shipunova:
Forgotten under the water The stars float on the bottom,
And covered with a shawl, Stars in the sea are looking for food.
Warmed by a warm current, a fat crab crawls, hurries,
Shell - the pearl is sleeping. Pisces scares and laughs.
A droplet clarifies the idea of \u200b\u200bchildren about what algae and corals look like. She informs the children that today they will create an unusually beautiful picture. underwater seas - a forest of algae in which fish play hide and seek. Explains that children themselves can choose what they will do underwater forest - cut out of colored paper or weave from threads and stick on an unfinished composition.
Think for yourself how to cut or weave beautiful thick seaweed: strips, waves can be cut out of paper, and bundles can be twisted from threads.
Ribbons can be woven, twisted, twisted, and then decorated with different ways: add spots - pieces of torn paper or confetti.
Next, Droplet asks the children to describe the structure and shape of the body of the fish, she is interested in how to show the naughty fish in motion (bend the body or tail). Shows options for decorating fish.
Children choose art materials, tools of their choice and begin to perform a creative task. Cut out of yellow, green, pink paper, decorate with patterns and stick their own composition work. If desired, children can combine different materials and technology. They can cut out other inhabitants of the sea. For example: a fish is cut out of paper and decorated with multi-colored threads. Perhaps one of the children will have time to participate in both compositions.
Children complete the design of the composition. The droplet and the teacher place the finished composition in a wooden frame and show the finished picture to the children.
Related publications:
I want to present one more work by the trimming method "Bullfinches have arrived" This time, on your advice, we decided to make a background in the same technique.
 Purpose: the creation of a joint application by children with origami elements. Tasks: 1. continue to teach children how to create an application (skills and abilities);
Purpose: to exercise children in gluing round, oval shapes of different colors. Strengthen the ability to hold the brush correctly, spread evenly.
For a collective lesson in fine arts with application elements, I decided to take such an interesting and informative topic: "Living in the ice" (animals.
Purpose: To teach children to sculpt beetles using walnut shells and plasticine, to convey the structure (torso, head, six legs). Pin.
Summary of GCD on applications for children of the second junior group "Gift for dad" (teamwork) Synopsis of GCD on artistic creativity for children of the second younger group. Application "Gift for DAD" (Teamwork). Direction:.
Daria Karpukhina
We already had the main part of the fish ready, but we need to add the head and tail to it. We drew and cut them.

When all the parts were prepared, we began to draw up our teamwork. We placed our fish in the "blue sea" and glued them.


Related publications:
The hot summer has come! The grass is green. Fragrant flowers bloom. Colorful-winged beautiful butterflies flutter merrily over the flowering meadow. Here you can.
Hello. Dear Colleagues. So I want spring, I decided to make these flowers. For this we need: glue, colored paper, scissors, jar.
Well, that's soon New Year, the guys made gifts to their parents, but they want to do something for themselves, so I offered them to make Grandfather.
Purpose: the creation of a joint application by children with origami elements. Tasks: 1. continue to teach children how to create an application (skills and abilities);
From my first junior group decided to make a craft world day child protection. I have long wanted to try sprinkling with colored semolina.
After talking with the children on the topic “Do you believe in magic and miracles?” The children said they believe in both magic and miracles. Many dream to see
Abstract of the lesson on the application. Collective work "Underwater World""Underwater world". Tasks: To teach children to make a collective composition from molded and carved figures; Keep teaching your kids on your own.
Gift for Mother's Day. to make a gift you will need: 1. Colored cardboard 2. Colored foil 3. Velvet paper 4. PVA glue From color.
Summary: Marine crafts with their own hands. Crafts on the marine theme. Summer crafts. Application summer. Application on the theme of summer. Summer applications. Volume application.
1. DIY marine crafts. Craft "Aquarium"
Like this interesting craft on a marine theme can be made from an ordinary cardboard box.
Cover the box with colored paper or paint. Paste the entire box from the inside with blue or blue paper, and the bottom with paper yellow color. If possible, glue pebbles or shells to the bottom.
Decorate the bottom with paper or plasticine seaweed.

Draw, color and cut out marine creatures such as fish, crab, starfish, little mermaid. You can choose ready-made templates of the inhabitants of the underwater kingdom at the link >>>>
Now it remains to tie strings to them and attach them on top of the box. On some threads, you can string small beads that imitate air bubbles.

You can make animals mobile as follows (see photo below). Cut holes along the top of the box. Attach buttons to the animal threads. Now you can move the buttons along the holes to change the position of the inhabitants of the aquarium.

2. Crafts on the marine theme. Paper craft "Aquarium"
Very a large number of a variety of paper aquariums can be found on the Creative Park website from Canon. Only unlike the previous crafts from a cardboard box, which even a preschooler can do, paper crafts from Canon aquariums are designed for school-age children and adults. Finished aquariums can become original gift DIY for friends and relatives.


3. Summer crafts. Volume application
Here is such an unusual voluminous application from paper "Sea" offers to make the Bulgarian site Krokotak.com. As a decoration, you can put it on the table or, by attaching ropes with beads to it, hang it on the wall. detailed wizard see the class for making this summer craft at the link >>>>

4. DIY marine crafts. Inhabitants of the underwater world
From ordinary paper plates, you can make colorful fish with a little imagination. See link >>>>

You can also make such funny fish >>>>

From a paper plate folded in half, luxurious shark jaws are obtained. See link >>>>

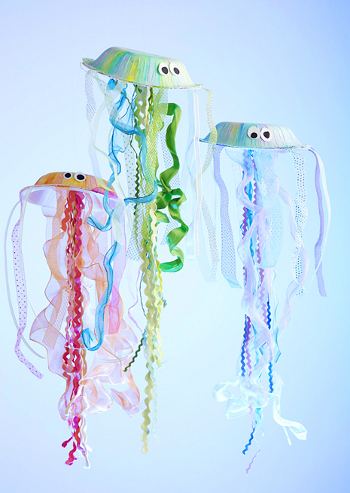
And if you attach colored ribbons and braid to the bottom of the plate, you get a jellyfish.
From a cardboard base from a used roll toilet paper you can make an octopus. For a detailed master class on making this marine craft, see the link >>>>

Stick small pasta-stars on a cardboard template base and you will get another inhabitant of the underwater world - a starfish.

Epson on its website with paper crafts offers a large number of ready-made patterns for making crafts on a marine theme. See link >>>> Here you will find a jellyfish, a starfish, a shell with a pearl, a crab, a turtle, and various fish. Crafts are designed for school-age children and adults.
5. Application summer. Application on the theme of summer. Summer applications
Let's finish our review article "Summer crafts on the marine theme" with several summer applications.
Application summer. Fish on a rod
Have the child trace and cut out the silhouette of their hand. Separately draw and cut out a fish and a fishing rod. To make this summer craft, you will need a string.
First, glue your hand onto the paper, leaving four fingers (except the thumb) unglued. Put the fishing rod in your hand, also gluing it to the paper. Bend your fingers. At the end, glue the fish and the rope. Summer application "Fish on a fishing rod" is ready!

Application on the theme of summer. Sunglasses
For this application you will need: a thick sheet of black paper, a white sheet of paper, colored cardboard, colored pencils or felt-tip pens, scissors; a marker that draws in silver or gold.

Fold a black sheet of paper in half, draw a half of the glasses on the fold. Cut them out.
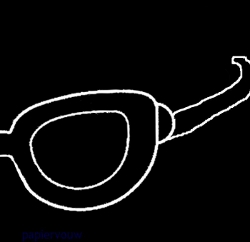
On a sheet of white paper, draw a picture on summer theme. Color it. After that, put glasses on the drawing and move them along it until the most successful pictures appear in the glasses of the glasses. Glue the glasses on the drawing in this place and cut them out again.
Now you need to stick your application on a sheet of colored cardboard. If desired, at the end, you can decorate the glasses with a silver or gold marker. Summer DIY is ready!
Application summer. Sea boats
We invite you to perform a very original, in our opinion, summer application. For this you will need:
Paints (green, blue, white)
- brush
- white sheet of paper
- a sheet of cardboard in blue or blue
- colored paper
- glue
- scissors

Work plan:
1. Apply strokes of green, blue and white paints on a saucer without mixing them.
2. Take a brush and a white sheet of paper. Dipping the brush in several colors at the same time, paint the paper with colored waves. Let the paint dry.
3. On a sheet of blue or cyan cardboard, glue a rectangle cut out of gray or yellow colored paper from below. The length of the rectangle is the same as that of a sheet of cardboard, the height is about 8 cm.
4. Tear the sheet of paper that you previously painted with paints and left to dry into narrow strips. Make the smooth edges of the first and last strip also wavy.
5. Stick the strips onto the cardboard, overlapping each other, starting from the bottom. Glue the strips to the sides of the cardboard.

6. Cut out boats with masts and sails from colored paper. Make some boats bigger, others smaller.
7. Stick the boats between the waves, hiding them partially under them. Glue larger ships on the bottom, and smaller ones on top of the sheet, thereby creating the illusion of perspective.
At the same time, glue the strips of paper to the cardboard completely. Recall that before that they were glued only on the sides.
8. Glue the masts and sails at the end.
Application summer "Sea boats" is ready!
Summer application. Slates
To make this summer craft you will need:
Colored paper (blue and cyan)
- White paper
- a sheet of thick paper or cardboard
- colored pencils or markers
- scissors
- pushpins with a round head

Work plan:
1.Tear the blue colored paper and blue flowers on strips, stick them on cardboard. In this case, the edges of the strips should partially overlap each other.
2. Circle the feet in shoes on paper, cut out the resulting silhouettes. Color them with colored pencils or felt-tip pens in bright colors.
3. Cut 4 strips from scraps of paper: 1.5 cm wide, 15 cm long. Color them in too.
4. Stick the slates on a sheet of cardboard, after folding the paper straps under them. Pin the straps on top with decorative push pins.
Material prepared: Anna Ponomarenko
Other publications on the topic of this article:
Ludmila Ershova
IN underwater kingdom, life flows in its own special way. These creatures are so beautiful, diverse. And we decided to try to make our own with the guys amazing underwater world. For this we need the following materials:
1. colored paper (preferably double sided)
2. disposable paper plates.
3. gouache, jars of water, paint brush.
4. scissors
5. PVA glue and glue brush (cotton buds)
1. Fine art element.
First of all, each child receives a disposable paper plate. Since we do undersea world, then the plate is completely covered with blue (blue) paint. This will be the basis and background of our underwater world(aquarium). After the children have made the background, the plates are placed on a separate table to dry.
2. Manual labor (origami)
While the plates are drying, we start making the most fish:
1. Put a finished square in front of you (size 12 by 12 - can be more, can be less)

2. Fold the square in half twice to make a cross in the middle.

3. Expand the square. Then turn each corner to the middle of the square. Flip the item.

4. Then put the square towards you so that one of the corners "looks" at you. Alternately to the middle we bend the lower corner, right and left. It turns out an unclosed letter.

5. We turn the part over and bend the two lower corners to the middle. It turns out "Candy". Flip the item over again.

6. After the part is turned over, the curved triangles "look in right side", gently pull out the pocket of the rear triangle with your fingers, we get the tail of the fish.

7. We bend the upper triangle up, and the lower one down - we get two fins.

8. Bend a little near the nose of the fish and the upper fin upper part back so that the fish does not look like an airplane.

3. Application(work with scissors and colored paper)
After the fish is made, we put it aside. Take a small piece of colored paper ( green color, fold the paper with an accordion and cut out the algae. Here, children are invited to dream up what kind of algae they will have. (large - small, thin - thick, carved or straight). After all the details are prepared, we pre-assemble all the parts into one, the children are invited to distribute their composition on a plate.


Then we get to work. Using PVA glue, brush (cotton buds) we carefully transfer the parts to a plate.
Sea stones can paint with gouache, but you can use natural material.
The result of our work is such: