Master classes on making interesting New Year's toys from felt. Felt Ball Earrings Felt Balls

I made New Year's felt balls with a fiery cockerel in three types. There just wasn't enough time for the fourth one. But he is 🙂 This MK contains all the subtleties of creating such decorations for the Christmas tree.
I warn you in advance, I did not publish the templates (patterns) in the public domain. But I will send them for free to everyone who wants to leave at least 3 comments on any pages of my site (preferably where there are the fewest comments 🙂). So you can thank me for my work.
For work you will need:
- felt of medium hardness 4 colors;
- colored pencils in the color of felt;
- template printer;
- embroidery threads with a sharp needle;
- pins;
- sharp scissors - for small details it is better to use manicure in general;
- sintepuh for stuffing;
- glue "Moment Crystal";
- toothpick and paper napkins- just in case.
How to make from felt:

- We print the template. The pattern is specially given in Word format so that the dimensions of the patterns are preserved regardless of the settings of your printer. The details are very small. Therefore, it is highly undesirable to reduce the size.
- Cut out the details. Please note that a large part (a ball with a pimpochka suspension) must be cut out carefully, and small parts can simply be cut in a circle. In the future, apply the circle of detail to the felt and cut along the lines already with it.
- Depending on the available shades of felt, we choose pencils and plan color combinations - we color the picture. I decided to make a cockerel on a delicate blue background of red, orange and yellow flowers felt.
- Cut out pieces of felt. Try to be very careful, as the felt in small pieces can be deformed, and small and long parts can tear or crumble at the edges.

- We lay out the cut out parts on one half of the ball to determine their location and correspondence to each other. For example, if the neck frills are not aligned with the notches of the body, it is better to cut out the details again. Otherwise, the work will not be accurate.
- Now we remove the parts one by one, lubricate the back with glue with a toothpick, and return the ball back to the felt, press it. There should be enough glue to glue the part well along the entire perimeter, but at the same time, excess glue should not stain the background.
- When all the details are glued, we start embroidering. Sew on a bead-eye. With a thread of a different tone, we embroider the middle of the beak, wing feathers and legs. We fill the free space with white snowflakes from large and small crosses located on top of each other.
- Now add two pieces Christmas ball together wrong sides inside. With an embroidery thread of a contrasting color, we first connect with straight stitches in the area of \u200b\u200bthe suspension. We sew the perimeter of the ball with a manual seam over the edge. Try to make punctures with a needle at the same distance from each other and from the circumference. I didn’t get quite even distances, but it doesn’t catch my eye.

- Do not forget to stuff the toy with sintepuh. Try to distribute the stuffing evenly and not too tightly so that the surface of the ball becomes convex, but not deformed.
- On the last stitches, we do not cut the thread, but bring it to the middle of the pimpochka (sorry, I don’t know what this thing is called) and make a suspension. We hide the extra tail from the inside.
Shared the master class
Anastasia Kononenko
And the assortment will definitely tell you a lot of great ideas for decorating balloons and creating new toys.
To sew a mobile from felt, you will need:
- felt in eight different colors (or less if you want to repeat colors through one);
- needle and thread or sewing machine;
- cotton wool or synthetic winterizer for stuffing;
- bottle caps, buttons or sequins for decoration.
1. Print out the pattern. Select right size parts-petals of the ball and transfer the pattern to sheets of felt of different colors. Cut out. Also cut out a circle from the felt.

2. Sew the petals of the future ball together using a machine or manually. On one side, leave the hole unsewn - you will need it to stuff the toy. Turn the ball out.


3. Fill the ball with padding polyester or cotton. Close the hole by sewing on a circle of felt.

4. Baskets of balls - a cork from a bottle of wine, cut in half and decorated with felt strips. They can be easily glued to supermoment glue.
5. Decorate the balloons with stars or sparkles, if desired.

6. Hang the ball from the mobile disk with long strong threads stretched through upper part ball. Or maybe you will add snow-white clouds to your mobile, as we did, or colorful drops rain. Create your own unique toy that will delight your baby!

And the assortment will definitely tell you a lot of great ideas for decorating balloons and creating new toys.
To sew a mobile from felt, you will need:
- felt in eight different colors (or less if you want to repeat colors through one);
- needle and thread or sewing machine;
- cotton wool or synthetic winterizer for stuffing;
- bottle caps, buttons or sequins for decoration.
1. Print out the pattern. Select the desired size of the parts - the petals of the ball and transfer the pattern to sheets of felt of different colors. Cut out. Also cut out a circle from the felt.

2. Sew the petals of the future ball together using a machine or manually. On one side, leave the hole unsewn - you will need it to stuff the toy. Turn the ball out.


3. Fill the ball with padding polyester or cotton. Close the hole by sewing on a circle of felt.

4. Baskets of balls - a cork from a bottle of wine, cut in half and decorated with felt strips. They can be easily glued to supermoment glue.
5. Decorate the balloons with stars or sparkles, if desired.

6. Hang the balloon from the mobile disk with long strong strings stretched across the top of the balloon. Or maybe you will add snow-white clouds to the mobile, as we did, or multi-colored raindrops. Create your own unique toy that will delight your baby!

Master class on the topic "Manufacturing Christmas toys ball" with step by step photo
Author: Kutyanova Lyubov Alekseevna, teacher
Place of work: MBDOU " Kindergarten No. 315, Nizhny Novgorod
Master class with a step-by-step photo "Making a Christmas ball toy"
Description: this master class is intended for children from 7 years old, teachers primary school, teachers of additional education and people who love creativity.Purpose: New Year's toy on the Christmas tree, interior decoration for the New Year.
Target: making a Christmas tree toy - a ball in an unusual technique.
Tasks:
1. Teach how to use felt to decorate the ball;
2. Develop fine motor skills hands;
3. Cultivate accuracy, perseverance;
4. Cultivate interest in creativity, fantasy.
Materials needed for work:
1. Felt (2 pieces)
2. Ribbon.
3. Ball.
4. Beads or beads.
5. Threads.
6. Shiny or silk threads.
7. Scissors.
8. Glue Titanium.

New Year- game time
Here's room for the imagination
What a miracle - decoration
Christmas balls!
Say, the balls are familiar,
Eternal Christmas dress?
This is so, but on a normal,
Not exactly a deep look.
And a cherished fantasy
Change your look!
Stages of the craft:
1. Prepare the base for the ball. It can be a plastic ball or a smooth one. christmas ball. Secure the hanging loop with ribbon.

2. Cut out a rectangle from the felt. (I divided the original piece of felt into 4 equal parts). Roll the resulting fourth part into a roll 1-2 cm thick. Fix the edge with Titanium glue. To prevent the roll from blooming, I wrapped it with a regular thread and let it dry for a day. It took 8 such rolls for my ball.

3. When the blanks rolls dry, remove the threads.

4. Cut the felt roll into spirals 0.5-1 cm wide.

5. Paste the ball with the resulting spirals, starting from the top where the loop is attached. Use titanium glue.

6. Try to fit the spirals tightly to cover the entire surface of the ball.

7. This is how the balloon will look when it is completely filled with spirals.

8. Choose beads that will look nice with your balloon. Glue the beads into the center of the spirals and between them.

9. Loosely wrap the ball with a shiny thread, secure it. Decorate the base of the loop with a ribbon, tie it off, curl it with scissors, and spread it randomly over the surface of the ball.

10. Our ball is ready.

Thank you for your attention!
Balloons from the most distant childhood seem to us something mysterious, magical and alluring. In this article, we invite you to immerse yourself in the very atmosphere of childhood, build balloons with your own hands, dream about beautiful things and just have fun.
Balls are different types: flying, rubber, with helium, a variety of crafts. In many adventure films we have seen people travel by balloons. Nowadays, it has become an amazing attraction for the whole family. It is impossible to make such transport for flights on your own, but it is a great idea for a children's launch into the sky.
Mastery Fundamentals
First of all, you need to know the components. It consists of a dome made of durable material, a basket and a burner.
In this tutorial, you will learn how to create a launch ball with a diameter of 2 meters. So let's get started:
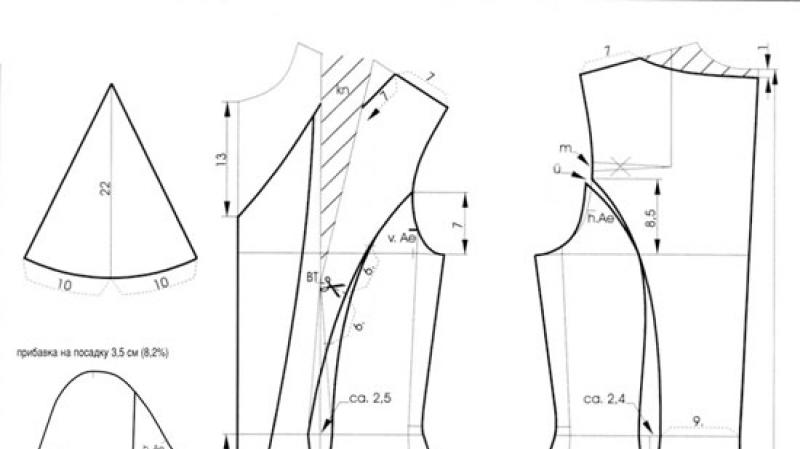
- First, prepare a template according to the diagram. Make a pattern on it on cardboard;
- the segments themselves are made of paper, preferably cigarette paper, if it does not fit the given size, it can be glued together, this will not affect the quality of the idea;
- after gluing the segments, cut out the cardboard blanks, the template is ready;
- attach the sample to tissue paper and cut out 16 parts from it. Do not forget to leave one centimeter, taking into account further gluing;
- glue the finished segments in two, then connect all the pairs together, but leave one seam;
- turn the shell inside out and seal the last seam;
- cut two rectangular strips from cardboard and use it to fasten the base. Then, attach two strong thick threads to them, which will allow you to hold the ball when it is heated;
- cut the circle to the size of the dome and glue on top to fill in the gaps that were left during gluing;
- heat the blowtorch and use it to spread the ball;
- take the finished dome by the strings and make a fire under it.


When the air warms up balloon, it's ready to run.
Air Smeshariki
Such cute balls are suitable for decorating children's parties, birthday celebrations.


And we'll be happy to show you how to create them.
For this we need colorful balloons (round shape), balls of the smallest diameter, modeling balls, double-sided tape and markers, depending on the intended character.
Take a big round balloon and inflate it. With the help of small ones, make legs and arms, attach with double-sided tape. Model ears or a headdress with the help of modeled balls and draw with a marker: eyes, nose, mouth. In order for our Smesharik to look like a cartoon exhibit, it would be better if you keep a photo of the selected hero in front of you.
lamp ball
Surely everyone in the house burns out light bulbs very often, after which we mercilessly throw them away. What if we try to give them a second life? Let's make our ball of light bulbs.

So, let's begin.
Prepare an old light bulb, glass outline, twine (or thick thread), gouache. Degrease the light bulb in advance with alcohol.
Draw the picture you like on the bulb with a contour, and fill the empty spaces with gouache. Gently wrap the base of the light bulb with twine (this will be a craft with a basket in the form hot air balloon). On the narrow shape of the light bulb, draw lines imitating the ropes that connect the basket to the ball. The advantage of this craft is that you can decorate it in a variety of ways: make a strapping, glue it with a cloth, and even cover the light bulb with stained glass paints.

Cheerful Luntik
It's no secret how kids love to watch a cartoon about Luntik.

In this article, we will show a master class on how to make crafts from balloons.
For this we need: 4 balls of 25 cm, two big ball 45 cm each, 6 modeling balls and 2 simple smallest ones, double-sided tape, markers.
- take 4 balls of 25, inflate and tie together into a four (the base of Luntik);

- next, take a large ball and attach it to the base with tape;
- then, we need to make a neck out of balloons for modeling. Fold as shown in the picture and attach to the torso;

- inflate a 45 cm balloon, slightly smaller than the body, draw a muzzle on it with a marker and glue it to the neck;
- use the smallest balls to make handles;
- it remains to make only the ears, they are made very simply. From the modeling balls, make eights in pairs and attach to the head.

