Star News


")


Quilling intricate work flowers. Quilling: learning to create real masterpieces in the paper rolling technique. DIY quilling flowers. asters
Educator MBDOU CRR D / S No. 4 "Freckles", Kolomna, Moscow Region.
The picture will become an unusually gentle and bright gift for any beloved and dear person, it will bring a feeling of joy and happiness into the house. Looking at such work, you always want to smile, give love and create warmth and comfort in your home. I wish you all a pleasant viewing.
A small lyrical digression from me.
Little angels lived high in the sky. Not knowing grief and sadness, they fluttered all day long, like butterflies, drinking heavenly nectar, basking on soft downy clouds-featherbeds. And it seemed to everyone that there was no one happier than them in the world. In heaven, the Guardian guarded the little angels and very often told them stories about earthly life. One day he approached an angel girl and said to her:
- Honey, you have become quite an adult, it's time for you to go to Earth.
The girl was very frightened:
- And how will I be there without you? Who will sing me lullabies, read fairy tales, rock on a downy cloud? Who will warm me on cold nights and remove tears from my eyes? Who will kiss my cheeks and stroke my head? And what am I going to do there, I can’t do anything?
The guardian smiled, ran his hand through his luxuriant hair, and said:
- Do not be afraid, my dear, I will send you a Guardian Angel who will love you more than I do, protect you from all troubles, sing sweet songs, read fairy tales, bathe in air foam and give a lot of happiness, tenderness and affection!
- Tell me, Guardian, - the angel girl smiled - what will be the name of this wonderful Guardian Angel?
- His name will be Mom! She will always be by your side. The Guardian answered and disappeared.
- Mom, what a beautiful and tender name, the girl thought and hurried to Earth to meet Mom!
And here is our angel girl. The main part of the work is done in the technique of "Looped quilling". Flowers - "Volumetric quilling". The background is from an appliqué with trimming elements.
The following equipment is required for operation:
❧ Paper for quilling. The paper is sold ready. You can buy individual colors, you can buy assorted or shades of the same color.
.jpg)
.jpg)
❧ Sharp tip tweezers, long tip roll stripper, toothpick, officer's ruler/
.jpg)
❧ Cork base, stationery pins
.jpg)
❧ Tinted paper, you can buy a set or the colors you need. We need green in different shades and white
.jpg)
❧ Paper scissors, manicure scissors, PVA glue
.jpg)
❧ Graph paper
.jpg)
❧ Drawing to work
.jpg)
Progress
We start with the dress. We make loops.
To do this, put graph paper on the cork base, you can cut off a small piece 5 cm wide, it’s more convenient
.jpg)
Next, we mark the distance between the turns with pins. The smaller the distance you have, the more beautiful and neater the loops will be. In my work, I first took a distance of 3 cells, 1.5 cm, which I was not very happy about later, loops made with a distance of one cell look much more beautiful and interesting.
.jpg)
On the central pin we fix a paper strip for quilling (width 3 ml), from which our dress loops will be
.jpg)
We begin to wind the strips around the pins
.jpg)
.jpg)
The turns at the junction, approximately in the middle, are periodically fastened with a drop of glue
.jpg)
The loop is ready, it remains to remove the pins
.jpg)
We start to take out the pins from the middle
.jpg)
The loop can be made longer or shorter, the size of the loop depends on the length of the pattern. The drawing will be more accurate and uniform if there is one loop from the beginning of the drawing to the end.
We remove the remaining pins, we get such a loop
.jpg)
Now we take our drawing. Under the dress we put a cork backing. On the dress, where the first loops will be, we apply glue and begin to pin the loop along the contour of the dress
.jpg)
Gradually remove the pins from above
.jpg)
.jpg)
It turns out such a loop
.jpg)
For the next loop, we apply glue on the dress and, pressing firmly, we attach the second loop with needles, etc. Press the loops tighter, otherwise there will be large voids. The needles are gradually either rearranged or removed completely
.jpg)
It turns out something like this. Since I didn’t press the first loops, and I had a large distance between the turns, I got large gaps
.jpg)
While I was doing this, I found another way to make loops, this method is the most convenient and fastest. We take several strips, 5-7 pieces, and begin to put them into a roll. The first bend is small
.jpg)
We make the second bend more. Each next bend is increased
.jpg)
It turns out such a roll, folded without a quilling tool
.jpg)
We unfold the roll.
Take one strip

We fold the strip along the resulting folds into a loop.
It turns out a loop is no worse than a loop made on a cork substrate. The length of such a loop can be given by gluing several strips into long noodles. Be sure to dry the glued strips.

The resulting loops are also glued on the dress with the help of pins, a cork backing and glue.
.jpg)
Quilling, also known as paper filigree, is an art form that involves rolling (winding) and gluing thin strips of paper into various shapes and placing them on a horizontal surface to form various designs. Corrugated design can be very simple or complex, it all depends on experience, skill and patience. In this article, you will learn about how quilling pictures. A master class for beginners will help in mastering this interesting technique.
A bit of history
The art of quilling dates back to the Renaissance, when French and Italian monks and nuns used needles or quills to fold thin strips of paper into decorative designs that were then used to decorate book covers and other items.

Quilling today
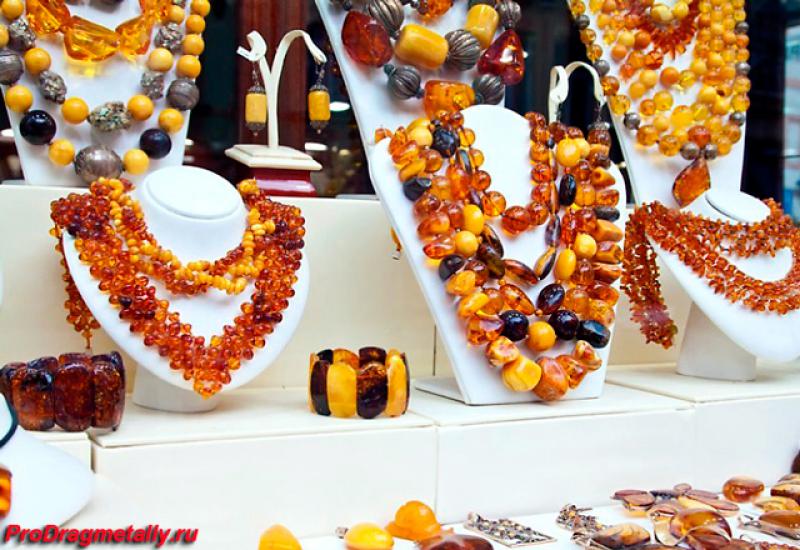
Now voluminous quilling can be found on wedding invitations, greeting cards, jewelry, decorations and even on the walls of galleries. This technique has become popular all over the world, largely due to simple and inexpensive materials. All you need is paper, glue, and something to roll the paper with. Although corrugated structures are made from modest materials, there is no limit to perfection when it comes to the most complex structures imaginable.

Necessary materials and tools
For quilling you will need:
Smooth paper tapes or strips.
Q-tip or a special tool with a slot at the end for rolling paper strips.
Scissors.
Glue.
Toothpick for applying a small amount of glue.
A pencil or felt-tip pen for drawing a contour (or a ready-made stencil of a drawing).
Pins (not always).

Master class: step by step instructions for beginners
Everything starts small. How are quilling paintings created? Manufacturing master class individual element future masterpiece:
Step 1. Take one paper strip prepared in advance and use the Q-tip to roll it into a tight coil.
Step 2. Apply not a large number of glue on the end of the strip, then, pressing lightly for a few seconds, glue the element to the surface previously lubricated with glue.
Step 3 Now you can pull out your Q-tip. Congratulations - you have just completed your first Hard Coil.

Many shapes and sizes
There are a large number of forms that can be used to getthey are also quite easy to make. So, by clamping the coil on one side and relaxing the tension on the other, you can form a teardrop shape, and by clamping two opposite ends, you can get almond shape resembling an eye.

To make a graceful curve in the form of the English letter "S", you do not need to wind the tape into a coil. Take a small strip and use a special stick or pencil to curl the ends into different sides. A heart shape is obtained by folding a paper strip in half, and then rolling each end towards the middle, do this until you get right size. Having learned how to make such simple elements, you can proceed to other shapes - triangles, squares, and so on.

Quilling Pictures: The Magic of Paper Ribbons
To build a complex structure, you need to stock up on perseverance and patience. It is best to start with a small project, such as manufacturing greeting card. This will help develop skills and get the first successful experience, devoid of feelings of disappointment. ANDYou can use a variety of quilling tools, including needles, a comb, stencils with spool holes, a paper shredder, tweezers, toothpicks, and more.Following simple instructions, you can master the technique and independently create the most incredible designs. It is also important to use good quality glue.

Art project "Tree with a heart"
With a simple set of tools and materials, you can create a wide variety of quilling patterns. Master class on making an art project"A tree with a heart" will help in mastering this beautiful technique. For work you will need:
A sheet of white cardboard or white paper for the base of the image;
- a sheet of black paper;
- a sheet of pink paper;
- glue;
- toothpick.

Just like other quilling paintings are created, the master class for making this project also includes several steps:
1. Drawing a sketch with a simple pencil.
2. Preparation of black (for the trunk and branches) and pink (for hearts) paper strips 5 mm wide.
3. Start with a tree trunk. Curve it and the branches in a way that makes it look more interesting.
4. In the free space between the branches, pink hearts are inserted, which are selected depending on the size.
5. Now it's time to fill the empty space inside the heart. To do this, prepare several turns of the desired diameter.
7. Cut off all excess and glue the end of the strip of each spiral made.
8. Fill with them all the empty space inside the heart.
9. Use long black strips of paper for the inside of the trunk and branches. That's it, your tree is ready.
Such beauty can be used as a gift to your loved one to express your love and gratitude. It's also a great idea for a surprise for Mother's Day or any other holiday.

As you know, quilling paper can be made independently or purchased at a specialized store, where there is a wide variety of colors and options. The picture will look more accurate if you first apply the outline. In order to create lines, you can use tweezers or a pin.

Coils are just as easy to make. A paper tape is wound around a special tip, the end of which is fixed with glue so that the coil does not diverge. Using necessary tools for quilling and well fastening the structural elements together, you can create real masterpieces. Models can be classified by complexity based on the number of colors used. It is important that the paper is not too thin, and the width of the strips should be about 3-5 mm.

Useful art technique
Knowing how to do quilling, many artists, designers and illustrators have adopted this technique. The secret to success is to use bright colors and whimsical patterns.

The size of the structure as a result of painstaking assembly is also important. Having learned that
how to make quilling, you can make very beautiful things fromtwisted paper strips. You can choose one of traditional forms, but this, as a rule, does not limit the artist's imagination.
Quilling paintings
The step-by-step instructions (see above) can help a beginner paper artist master the technique. But really complex work requires considerable skill. The big plus is that this beautiful view
needlework does not require large cash costs.On this moment you can find in specialized stores a wide variety of quilling tools that can simplify the work, but their purchase is not mandatory. Everything you need can be found at home or made independently from improvised materials.

You will definitely need scissors with sharp tips, which should be well sharpened, as well as a centimeter and a ruler. As a basis for structural strength, it is best to use cardboard in various colors.

Very helpful ready-made stencils with circles of different diameters. For lazy people who still want to learn paper rolling, as well as for those who like to save their time, ready-made quilling kits are provided, where there is everything you need to work.

Especially for lovers of art and needlework
The technique of quilling, or volumetric twisting of paper, appealed to many fans of art and needlework. There are a number of associations of interest, circles, where everyone can do this type of work, regardless of gender, age.
The demand for this technique is due to its advantages, namely its availability, low cost of materials, ease of manufacture, as well as the amazing beauty of the result.
Development of creativity and imagination
Like other types of needlework, quilling provides an opportunity to unleash creativity, this technique allows you to create unusual and original paintings, looking at which you experience real aesthetic pleasure. A successfully completed first creative work will certainly inspire you to continue creating masterpieces of your own production.

How to learn quilling
There are several options to choose from:
You can enroll in a needlework circle, where professionals in their field will help you master the technique.
You can purchase a self-study book, which will offer basic schemes, rules and recommendations.
You can use video tutorials on the Internet.
In any case, you should start simple. It can be individual flowers, simple drawings. Over time, you can try something more complicated, increase the number of elements, using all the new forms. In addition to paper, you can also use all sorts of various decorative elements, such as beads, sequins, beads, and so on. This makes stunning framed quilling paintings that can be used to decorate any room. This is especially true for holidays, when with the help of original things the necessary atmosphere is created, corresponding to the theme of the event.

Perfect gift
In the modern mercantile world, it is so nice to receive a gift made with soul and with your own hands. You can please loved ones and relatives, friends and work colleagues very original way. The fascinating process of creating quilling paintings will bring pleasure to the author himself, and the recipient of the gift will definitely appreciate the result of painstaking work. A beautifully designed three-dimensional panel in a frame will fit perfectly into any interior and will delight you with its aesthetic beauty for a long time.
Decorate the interior with a painting self made- isn't that a dream? But such a pleasure can cost a pretty penny, and it’s good if you can afford it, but if you are not ready to spend money on such an acquisition, or your soul requires creativity, make a picture with your own hands.
One of the ways to make paintings is quilling (paper rolling). A quilling painting may well become a real masterpiece, because you can create a bright, exciting composition from plain paper. Of course, most often quilling paintings are made in the form of flowers, but this is not the only solution, because you can create images of birds, insects, animals, people, nature, etc. Butterflies, birds on a branch turn out beautiful, and even more interesting - real gold fish, which you can then make wishes.
Today "Dream House" offers you a very detailed step by step master class for the manufacture of such a beautiful picture of flowers using the quilling technique.
Quilling paintings - master class
How to make a picture using the quilling technique with your own hands
A bright and cheerful picture, made by hand using the quilling technique, will decorate any home. This cute composition will surprise, please and, of course, will be a wonderful handmade gift.
For the manufacture of flower arrangement you will need:
- a set of multi-colored paper strips 3mm wide, 10mm wide and 50cm long;
- colored cardboard measuring 15x20cm;
- a fragment of beige textured paper (in this version, non-woven thick wallpaper was used);
- green paper;
- stationery knife;
- ruler;
- tassel;
- scissors;
- PVA glue for paper;
- blue beads;
- shiny powder of red and silver colors;
- toothpick;
- picture frame.
Stages and method of performing work on the manufacture of a picture
To make a red gerbera, it is necessary to glue together white and red strips, 25 cm each. You will get one strip 50 cm long.

Then, using a toothpick or a special quilling tool, twist them into rolls with a diameter of 13-14mm with a red stripe inside.

Using tweezers, shape the spiral into a petal shape. You should end up with 12 red and white petals.

According to a similar scheme, twist spirals with a diameter of 9mm (13 pieces) and 7mm (10 pieces) from red stripes. Also squeeze on both sides to get red petals of different sizes.

Then cut out a circle with a diameter of 4 cm from the paper. Inside it, draw a circle with a diameter of about 15mm. This will be the border of the core of the gerbera. To the center of the circle, make an incision, with which we will form a small cone for further attaching the flower to the picture.

Quilling flower pattern master class
Glue large petals on the inside of the cone. Let dry.

On the reverse side in a checkerboard pattern, slightly retreating from the edge, glue the middle petals.

While the blank for the quilling painting is drying, you can start making the core. To do this, glue a black stripe 3mm wide and 15cm long and a peach stripe 10mm wide and 20cm long. In the latter, make cuts along the entire length.

Twist the core, fix the end with glue.

Then glue the small petals first, and then put the straightened middle on and firmly drown it inside the flower.

In a similar way, make the rest of the gerberas.

To make flower buds, it is necessary to twist into tight rolls and glue strips of green and light green shades.

Then, using a thin stick or pencil, shape the rolls into a bowl shape.

Inside each bud, coat with an even layer of glue and allow to dry.

We make a picture using the quilling technique
Insert three petals into the bud and a thin core made from a strip 7-8 cm long.

There are two types in this composition. The first twist from two green stripes of different shades. Then gently evenly stretch the spiral to a diameter of 3-4 cm.

Press with fingers on both sides. So make the rest of the leaves.

Quilling - flowers for the picture
The leaves of the second type are made of ordinary colored paper. Better if it is double sided. Fold the paper in half, cut out a leaf with notches symmetrically.

Then fold again and fold several times with an "accordion".

Unfold the blanks, straighten them a little. Thus, make 4 leaves.

Now, when the main elements of the composition are made, let's start forming the background of our picture. Glue a beige rectangular fragment on top of the colors. To make it look aesthetically pleasing, it is better to cut the background with a clerical knife, and not with scissors.

Before fixing the flowers, the petals can be decorated with glitter. So that it does not crumble, you need to apply a PVA solution on the tips in half with water. And on top with a dry brush, apply powder.

Glue the gerberas, slightly stepping back from the center.

First, attach one sheet to the flowers.

And then others.

Insert the buds inside the leaves. Inside one of them, you can glue stamens from beads.

Arbitrarily glue curly branches. They are also made from twisted but well-spread 15cm long strips.

Quilling - a picture of flowers
And at the end, glue the remaining leaves under.

Let the composition dry for 3-4 hours.

The article will tell you about the secrets of creating flowers using the quilling technique.
There are no boundaries for creativity. And for creativity from paper - even more so. After all, paper is an easily accessible and cheap material, which, moreover, has excellent decorative properties. The modern creative industry has created hundreds of types of paper, different colors and textures. One of modern species creativity from paper is quilling. It originated not so long ago in the west. Quilling is quite simple and anyone can master it.
- The main advantage of quilling is its simplicity. Having learned how to create several basic shapes, you can make shapes of any complexity.
- Another advantage is the availability of materials. All you need for quilling is special paper cut into thin strips, tools and PVA glue.
- Quilling paper is sold ready-made. Quilling masters do not even need to spend time preparing it. This paper has many shades and several sizes.
- Quilling opens up a wide scope for creativity. To create in this vein, you do not need to have super talents.
- With the help of quilling decor, you can decorate postcards, albums, notebooks, create individual shapes
- Being engaged in quilling, each master chooses his favorite motifs. The simplest and most beautiful motive is flowers.
How to make beautiful quilling flowers?
- You need to start making flowers with an idea. Make a sketch and outline the location of future flowers
- Think about what kind of flowers you will portray. Study the structure of this flower, see the photo of the original on the Internet. Pay attention to the number of petals, leaves, stem length
- Prepare materials. The first is paper. To avoid cutting the paper yourself, buy it from a specialized store. As a rule, it is sold in a set of several colors. Choose the one that will best suit your colors
- Also, prepare tools and PVA glue. From the tools you will need tweezers, with which strips of paper will be twisted. If you are a beginner crafter, purchase a stencil for quilling details. So you will get even figures
- Prepare the workplace so as not to stain the paper tapes and the base with PVA glue
- Think over what details the flowers will consist of and how many such details are needed.
- Details are best prepared in advance and not in a hurry. The main thing is to enjoy the creative process.
Quilling: dandelions, photo
Dandelions are a symbol of the coming of summer. It has a bright yellow color that will decorate any composition. Dandelions are easy to make.

 Dandelion
 Dandelion
 Quilling: carnations, photo
Bright carnations can be made separately or added to a bouquet with other flowers. Carnations look strict and rich at the same time. Combine different colors of paper to make those colors look realistic.

 Carnation
 Carnation
 Quilling: daisies, photo
Delicate daisies are perhaps the simplest quilling flowers. Even a beginner can make them. A more experienced craftsman can combine daisies with other flowers to make the composition look richer.

 Chamomile
 Chamomile
 Tulips in quilling technique, master class
- Tulips are bright spring flowers. For them, paper of yellow, red, purple or pink shades is suitable.
- Tulips made using the quilling technique can be used to decorate a postcard for March 8 or a notebook. Also, you can make a separate composition or picture
- For tulips, you will need paper (for buds, stems and leaves), thin tweezers, scissors, PVA glue and, if possible, a stencil
- It is necessary to think about what shape the bud will be. The simplest form is in the form of a crescent. However, tulips in this case will turn out to be only schematic.
- Think about what the background will be for future tulips. It should in no way be brighter than the flower buds themselves.

 tulips
 Video: Quilling tulips, master class
Lilies in quilling technique, master class
- Lilies come in a variety of colors: white, pink yellow or orange
- Despite the fact that the most suitable color- white, it is better for beginners not to work with him. White paper very brand. If the skills of working with materials have not been formed, the novice master will simply stain the white paper
- If you still decide to work with white quilling paper, wait for the elements to dry completely. Otherwise green color leaves can stain the white petals
- Quilling lilies can be flat or voluminous. From them you can create a wonderful composition for decorating the interior. Lilies go well with roses.

 lilies
 Video: Lilies in quilling technique, master class
Roses in quilling technique
- Roses are not easy to make. Therefore, it is better for beginners to start by making other colors.
- Most often, roses are not made from a standard roll shape. For a rose, the paper is twisted so that the flat parts come out, imitating the petals of a flower.
- Roses can be made flat or voluminous
- The best colors for roses are red, pink and white. Experienced craftsmen know how to combine several shades to make the rose look realistic (darker inside and lighter outside)

 Roses
Roses Video: Quilling roses, master class
How to make daffodils using quilling technique? Master Class
- Pay attention to the structure of daffodils: these flowers have a head that is pointing down. Also, they have petals and an inner bell bud.
- To make the daffodil look like itself, it is better to make it voluminous. Then, all the details of the flower will be visible
- There are two types of daffodils: white with a delicate yellow center and yellow with a bright yellow center.
- Often, in order to simplify the manufacture of daffodils, they are made not from the side, but from above. That is, it seems that their buds are directed at the viewer

 Narcissus
 Video: Quilling daffodils, master class
Quilling: mimosa, master class
- Mimosa has many small flowers-balls and sharp leaves. To make it, you need bright yellow and dark green paper.
- Notice the mimosa flowers. They are fluffy. This effect can be achieved by finely cutting strips of paper before twisting. Then, it is enough to fluff the cut parts
- Mimosa can be combined with other spring flowers: crocuses and tulips

Video: Mimosa in quilling technique, master class
Quilling bouquet
The best thing about quilling is the sheer amount of creativity. And the beauties of nature are so immeasurable that they can be embodied forever. Having mastered the skills of creating individual flowers, the master can start making bouquets. Here you will need not only technical skills, but also a sense of style.


How to make beautiful quilling flowers: tips and reviews
- Quilling is a very painstaking kind of creativity. Only after acquiring skills, the figures will turn out more or less quickly. Therefore, be patient
- Neatness is the main factor for obtaining beautiful compositions. No matter how brilliant the idea is, it will simply be impossible to look at it in a dirty or uneven form.
- Paper parts are very small, so prepare a place to work in advance
- Wait until the part is completely dry before attaching it to the base
- Don't put too much PVA glue. Even a small amount sticks well to paper.
- Don't skimp on quilling tools. This will give you easier work and even parts.
- Take your time, stretch the pleasure of creating your masterpiece

 Flowers
 Don't limit yourself to creating just one motif. Look for the ones that you like the most.
Video: Quilling for Beginners Flower Quilling