Star News


")


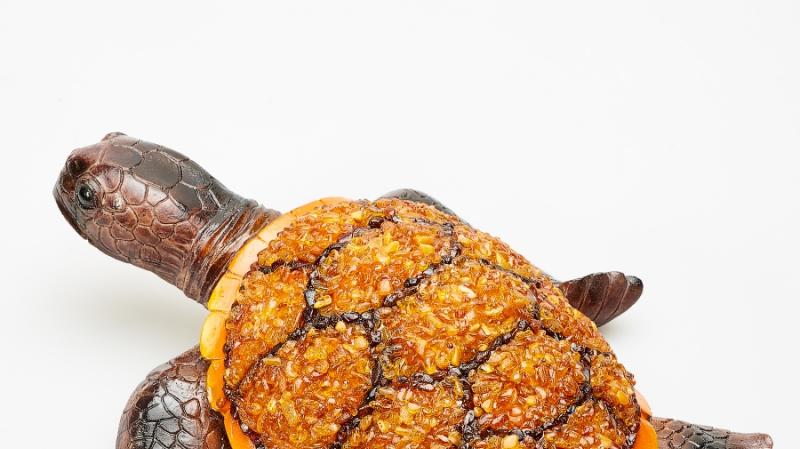
Crocheted strawberry berry. A sea of ideas: crochet strawberry potholder, diagram, step-by-step photo Crochet a berry diagram and description
If you already have some crochet experience, try making individual changes to the standard pattern. A diagram is a graphical instruction with symbols, if you follow which, you will get a tack exactly the same as the authors of the scheme promise. Minor deviations will only decorate the tack.
The standard product is a red berry with a green leaf on top. simple circuit does not imply such complication as the white and yellow dots of the berry, some kind of embossed additional pattern.


There are models that need to be knitted tightly, and there are tacks with openwork loose knitting.
How to improve knitting:
- Try to tie the kit- the same scheme, but, for example, berries of different colors;
- The set can also be a collection of different berries and fruits: the same strawberry plus apple, cherry, raspberry;
- Add decorative details that cannot be linked satin ribbons, ribbons, etc.;
- Add button beads if the product is strictly decorative, white beads can be sewn on instead of white or yellow dots on the berry.
Knitting can be improved not only by how complex the pattern will be, but also by the author's findings. But all, for the most part, are based on some universal model.
Crochet crochet potholder: video master class
Part 1: we knit a berry (video)
Part 2: final decor (video)
Tack berry: a simple scheme
If you learn how to crochet such a potholder, the rest will be given to you quite simply.
For one potholder you will need:
- Knitting hooks No. 3 and No. 5;
- 50 g of red (purple, orange) wool;
- 40-50 g of green wool.

Knitting goes according to the following pattern:
- Take a green thread and tie a chain in 16 air. loop, locking it into a ring;
- The first row begins with 6 air loops, 3 double crochets in 2 and 3 air loops. chain base loops;
- Next comes an arch of eight air. loops;
- The next moment is 3 double crochets in 3 and 4 air. loops to the base of the chain from the edge of the hook;
- Arch in three air. loops, 6 columns with a crochet in 5 and 8 air. loops;
- Arch in three air. loops, 3 tbsp. with a crochet in 10 and 11 air. loops;
- 3 air hinges, 6 post. with a crochet in the remaining air. chain loops;
- The first row ends with a connecting column;
- The next row is also knitted, slightly expanding the tack as needed;
- At the beginning of the fourth row, you need to attach a red thread, knit up to 17 rows according to the scheme.
After that, crocheting ends, the potholder must be folded in half, stitched.
If you are making a kit where you are going to crochet fruits and berries, they can all be the same color, but have different borders.
Features of knitting tacks
Maybe, following tips will help you understand what subtleties lie in crocheting, and what features of making potholders you should know.

Simple hints:
- Start knitting with simple shapes- hexagon, circle, watermelon slice. It's like training for more complex products, both the hand and automatic actions, and the understanding of drawing up diagrams, are well trained.
- Always knit with the crochets that are indicated in the instructions.. It is worth a beginner to tie a thing with the wrong hook, while experiencing quite logical difficulties, as he can be completely turned away from needlework.
- The first tack can be a square- if you easily read the diagram, you managed to knit an even, not overstretched, not twisted square, and even with a change in color, you will definitely succeed in a strawberry tack.
But even from the very first steps, “hook trials”, so to speak, keep an eye on how creatively interesting and unusual your product is.
Design tips in knitting
Sometimes the most a simple tack, which even a schoolboy can master in a couple of hours, can be turned into a small handmade miracle, from which it is impossible to take your eyes off. And all thanks to the author's findings, the decor of products.

So, for example, you can use the post-dyeing of yarn. Literally paint a white tack made of coarse yarn with fabric paints (remember the same batik). The product will be strictly decorative, but certainly will not go unnoticed.
Style unity - this is what the hostess of the house must observe in the interiors of her rooms. For example, you are an admirer of the Scandinavian style. And there is a lot of attention paid to textiles. And hand-made is encouraged too. Therefore, potholders of the same colors with a modest but “delicious” ornament will look great in the kitchen in coffee and milk colors.
Potholder crochet berry: do-it-yourself knitting (video)
When starting to knit, do not forget to save your favorite patterns, instructions, ideas with photos, etc. to your folder. By skillfully combining other people's ideas with your own ideas, your creative growth will be unambiguous, and you will soon feel like a master.
Potholder crochet strawberries (photo)


Size:
Cherries - about 3.5 cm in diameter.
Strawberries - about 5 or 6.5 cm in diameter.
You will need: Cotton threads of bright red color for berries, green - for cherry petioles and strawberry leaves;Cotton wool for stuffing strawberries;
Crochet hook No. 1.5
Description of work:
For cherries, tie a chain of 7 c. p., connect the chain into a ring with 1 ps. b/n. Link 3 in. lifting to replace the 1st tbsp. s / n., tie around another 23 tbsp. s / n., finish 1 ps. b/n. in the 3rd initial c. n. (= 1st circle). Each circle starts from the 3rd century. n. lift and finish ps. b/n.
2nd round: knit 1 tbsp. s / n. in Art. s / n. the previous circle, while adding 8 tbsp. s / n., evenly distributing them in a circle (= 32 st. s / n.).
3rd - 5th circles: knit 1 tbsp. s / n. in every st. s / n. the previous circle.
6th circle knit 1 tbsp. s / n. in every st. s / n. the previous circle, while each time 4 tbsp. s / n. knit together. Fill with cotton. Pull yarn through remaining 8 sts, pull tight and sew. Tie the petiole tightly. b/n. Sew on the leaves.
For strawberries, tie a chain of 6 c. n. and close it in a ring ps. b/n. Link 3 in. n. to replace the 1st tbsp. s / n., knit around another 13 tbsp. s / n., finish 1 ps. b/n. in the 3rd initial c. n. (= 1st circle). Start each circle with knitting in. lifting item (1 tbsp. s / n. replace 3 v. p. lifting, 1 tbsp. b / n. replace 1 v. p. lifting) and finish ps. b/n.
2nd circle: knit 1 tbsp. b/n. in every st. s / n. the previous circle.
3rd circle: knit 2 tbsp. b/n. in every st. b/n. the previous circle (= 28 st. b / n.).
6th circle: knit st. b / n., while adding 12 p., evenly distributing them in a circle (= 40 st. b / n.).
7th - 14th circles: knit 1 tbsp. b/n. in every st. b/n. the previous circle.
15th circle: knit 1 tbsp. b/n. in every 2nd st. b/n. the previous round, each time knitting together 2 tbsp. b/n. When the hole at the top becomes narrower, fill the knitted berry with cotton wool. At the end, pull the thread through the last 10 tbsp. b / n., tighten it and sew. For a larger strawberry, tie a chain of 6 c. p. and close it in a ring 1 ps. b/n. Link 3 in. lifting to replace the 1st tbsp. s / n., then knit in a circle for another 20 tbsp. s / n., finish ps. b/n. in the 3rd initial c. n. (= 1st circle). Start each circle with knitting in. n. lift and finish ps. b/n. (1 tbsp. s / n. must be replaced by 3 v. p. lifting, 1 st. b / n. must be replaced by 1 v. p. lifting).
2nd circle: knit 1 tbsp. b/n. in every st. s / n. the previous circle (= 21 st. b / n.).
3rd circle: knit 1 tbsp. b/n. in every st. b/n. of the previous circle, adding 7 p., evenly distributing them in a circle (= 28 st. b / n.).
4th and 5th circles: knit 1 tbsp. b/n. in every st. b/n. the previous circle.
6th circle: knit st. b / n., while adding 12 p., evenly distributing them in a circle (= 40 st. b / n.).
7th, 8th and 9th rounds: knit 1 tbsp. b/n. in every st. b/n. the previous circle.
10th circle knit st. b / n., adding 12 p., evenly distributing them in a circle (= 52 st. b / n.).
11th - 24th circles: knit 1 tbsp. b/n. in every st. b/n. the previous circle. Stuff the berry with cotton wool and continue knitting as follows: 25th round: knit 1 tbsp. b/n. in every 2nd st. b/n. the previous round, each time 2 tbsp. b/n. knitting together. Thread the thread through the last 13 p., Tighten it and sew. For sepals on strawberries, tie a chain of 5 c. p., connect it into a ring 1 ps. b/n. Link 3 in. lifting to replace the 1st tbsp. s / n., tie around 1 tbsp. s / n., * 2 in. p., 2 tbsp. s / n., actions after * repeat 3 more times, ending, tie 2 c. p., 1 ps. b/n. in the 3rd initial c. n. Next, knit according to the pattern, starting with the specified amount c. p., and finish ps. b/n. If necessary, the next circle to start ps. b/n. There should be 5 leaves in one sepal. The numbers indicate the circle number.
Source - a site about needlework and various types hobby – Trozo.Ru

Very often used to decorate knitted products. knitted appliqués or brooches. In this master class, we will crochet a strawberry sprig.
For knitting we need:
- Beaded yarn in dark green, red, white and yellow;
- Hook 1.75 mm;
- Scissors;
- A little synthetic winterizer;
- Needle.
First, we will tie the berries themselves. Knit 2 air loops to form the initial amigurumi ring. Then we knit 6 single crochets (stbn) into the very first loop.
In the second row, you need to make additions through the loop. That is, at the end of the row there will already be 9 loops. We knit 1 row without increments. Then add again through the loop. There will already be 12 loops.

In the new row we knit 12 stbn.
Now you need to complete the series, decreasing in each loop. In a circle we knit 2 loops together. We stuff the berry with synthetic winterizer.
Now we take a green thread and attach it to any loop. We collect 8 air and perform 1 stbn in a new loop. And again we collect 8 loops and perform 1 stbn in another loop. So you need to knit the whole row.


This will be the sepal. In total, any number of berries can be connected. In this case, there are 3 of them.
Now you need to collect a branch with berries. To do this, pull the loop through 2 loops on both sides of the berry. Then we make 16 air loops. We knit 5 connecting columns (ss). And then again we collect air loops. Now they need to be made only 7. We attach the berry by hooking it on both sides.
We cut the thread. Now, to attach the third berry, we will attach the thread to the last connecting column. Cast on 9 air loops. And attach a berry.

We'll remove the detail for a while. Now we will knit a flower. Let's start with yellow thread. Cast on 5 air loops and lock them into a ring. Then we will knit 10 half-columns with a crochet (pstsn) inside the ring.
Change the thread to white. We make 3 lifting loops. Then we knit 3 double crochets at the same point (stsn). Then we perform 3 sts in a new loop. We make 3 air and knit 1 sl-st here.

Now you need to tie the leaf. We collect 12 loops with green yarn. We knit 1 stbn in 10 loops, and in the 11th loop we perform 6 stbn.
We knit on the second side of 1 stbn, we do not knit 2 loops to the end. Now we will knit only for the back wall of the loops in each row.
We turn around and knit 1 stb in all loops, except for the last 2 on the other side.

We turn around and do not knit 3 loops now. We turn around again and do not knit 3 loops, now on the other side. Let's repeat 1-2 more times. In total, you need to tie 2 or 3 leaves.