Pre-treatment of fabric before cutting. Tips from practicing dressmakers. How to prepare fabric for cutting. Useful tips Preparing denim for cutting
PREPARATION FOR SEWING
Manufacturing technology garment consists of several stages (a series of actions), as a result of which the material is transformed into a finished product.
In general, this process can be represented as follows:
1. Taking measurements and performing the necessary calculations.
2. Making a pattern (building a drawing of the base, drawing shaped lines).
3. Cutting products.
4. Fitting.
5. Tailoring of the product - assembly of individual parts of the product into a single whole.
6. Finishing of the product and its wet-heat treatment.
Read more...
TAKING MEASURES
Any clothing should fit well on the figure, correspond to its size and height. In order to prepare an appropriate pattern, it is necessary to measure the figure of a person and write down the measurements.
Each measure has its own way of measuring and notation. For example, girths are indicated by a capital letter O, half-girths - C, widths - W, lengths - D, height - H.
Small letters (index) in the measurement record indicate the place where the measurement was taken. For example, St - waist half-girth, Sat - hips half-girth, Dtp - front waist length, Wg - chest width.
Taking measurements from a human figure occurs according to certain rules:
All measurements are taken according to right side figures.
The waist is preliminarily encircled with a narrow braid.
When taking measurements, the person being measured should stand straight.
When measuring, the measuring tape should not be pulled or loosened.
Length measurements are recorded in full. Width and girth measurements are recorded in half size, since the drawing is built on one half of the figure. For tailoring any particular product, not all measurements are taken from the human figure, but only the necessary part of them.
MAKING A PATTERN
In order to sew a product of a certain style, changes are made to the finished pattern of the base, i.e., modeling is performed. You can model different styles of the product. You can build the base pattern yourself, or you can use ready-made patterns from magazines. In both cases, the pattern drawing should take into account the features of the figure and be made on the basis of the measurements and calculations taken.
The human figure is symmetrical, so the drawing is also symmetrical and, accordingly, is usually performed on half of the product (up to the middle line of the front or back). Each line and point in the drawing has its own name, which corresponds to the initial letters in the names of construction lines. Design lines, in turn, are associated with the name of the measure. For example: points located on the waist line are denoted by the letter T. Since there can be several points on one constructive line, they are assigned an index in the form of a number. For example: T1 or T4.
After modeling, the pattern is prepared for cutting. Each part is indicated by its name, the direction of the warp thread, the necessary control marks and measurement points of the main structural sections, etc. Then the pattern details are cut out, taking into account the size of the seam allowances (see below).
PREPARING THE FABRIC FOR CUTTING
Includes the following operations:
Identification of weaving defects on the fabric.
Decating fabric.
Determination of the front and back sides of the fabric.
Determining the direction of the warp thread.
The performance of preparatory operations for preparing the fabric for cutting significantly affects the quality of the finished product, so they are mandatory in the manufacture of any garment.
Identification of weaving defects on the fabric
Before cutting, the fabric is carefully examined from the front and back sides. Defects are noted with chalk or colored thread: knots or thickening of the threads, breakage of the warp or weft threads, spots, non-colors, etc. When cutting, the marked places should be in the areas between the details of the pattern and remain after cutting as waste. 
According to the nature of the manifestation, textile defects are divided into two types: local and widespread.
- Local defects - small in size, located on a small area of \u200b\u200bthe fabric (spots, gaps, weft spans, twins, thickenings, etc.).
- Common defects are located on a significant part of the piece or throughout the piece (variation in hue, clogging, striping, etc.). Both local and widespread defects and defects of fabrics can occur at different stages of their production: both during spinning, due to the poor quality of raw materials or violations of technological regimes, and during weaving and finishing.
Fabric decathing
Decating is a preliminary wet-heat treatment of the fabric, necessary to reduce unwanted shrinkage during its further processing. The degree of shrinkage depends on the type of fibers and the density of the material.
It should be remembered that there are fabrics that cannot be decaged, as stains or wrinkles remain on them that do not disappear after ironing. Therefore, before decating the fabric, it is necessary to check how it reacts to moisture.
Velvet and corduroy do not decant, because when ironing, their pile is wrinkled.
IMPORTANT! WHEN SEWING PRODUCTS FROM NON-DECATED FABRICS, THE VALUE OF ALLOWANCES FOR THE SEAMS SHOULD BE INCREASED.
Determining the right and wrong side of the fabric
Before laying out the fabric on the table, it is necessary to determine the front and back sides of the material to be cut. Since the layout, basting and cutting of the details of the pattern, as a rule, is performed on the wrong side. The exception is double-sided fabrics, where the front and back sides are the same. In this case, you can cut on any side.
The front side of the fabric is determined by the following features:
- If the fabric is rolled up, then cotton, linen, silk fabrics are usually folded front side outward, and woolen, on the contrary, with the front side inward.
- If the fabric is printed, the design on the front side is usually brighter and clearer.
- Weaving defects (loops, knots) are displayed on the wrong side.
- Due to special processing, the front side of fabrics is usually more shiny and glossy.
- More expensive threads are usually output to the front side. For example, in semi-woolen fabrics, woolen yarn predominates on the front side, and silk threads predominate in semi-silk fabrics.
- In fabrics with a diagonal weave (for example, twill, boston), on the right side along the edge, the stripes go from bottom to top and from left to right (//////).
- On the front side of velvet or corduroy, a longer pile. On the wrong side, the surface is either smooth or the pile is shorter.
- The smoother side of the hem is usually on the right side of the fabric.
- If in the process of making the fabric, pins are injected into the edge, then they do it from the wrong side. 
Important!
Removed from the loom, the fabric goes through several finishing operations - it is singeed, bleached, impregnated with various compounds, dyed or printed on it. Through special processing, the fabrics are given a shiny or matte look, make them smoother or fleecy. All these operations are performed on the front side - therefore, it is usually smoother and shinier, it has fewer nodules and villi; she has a clearer drawing, etc..
Determining the direction of the warp thread in fabrics
The fabric is obtained by interlacing threads - warp and weft.
The warp thread in fabrics can be defined as follows:
- The warp thread in the fabric is parallel to the edge.
- The fabric stretches less in the direction of the warp than in the transverse and oblique directions.
Observance of the direction of the warp threads in the details of the product during cutting is very important, as this ensures the stability of the shape of the finished product and its greater strength during wear.
PATTERN LAYOUT
The layout of patterns on the material and cutting should be carried out on a smooth and spacious table. For work you will need: fabric, patterns, tailor's pins, scissors, a bar of soap or chalk, a pencil and a ruler, a measuring tape.
Fold the material for cutting in half or in a turn (see the section "Methods of laying fabric" below) and, having laid out the patterns of all the parts, make sure that there is enough material. Do not rush to cut out the details. Consider several layout options in advance and choose the most successful one. The material consumption and the quality of the cut depend on the quality of the layout.
There are several ways to lay fabric: twist and turn.
1 way: fold or "face to face"(Fig. 1a).
With this method, the fabric is folded lengthwise in half, with the right side inward and combining the edges. This method is used in the individual manufacture of clothing for cutting paired symmetrical parts. To prevent the fabric from moving when cutting, it can be chopped off with needles.
2 way: turn - "face down" or "face up"(Fig. 1b).
When cutting in a turn, the fabric is unfolded on the table in full width and length, face down or up. These methods are used when cutting fabrics with a directional pattern and pile (see below), as well as products of asymmetric styles.

Important! To achieve an economical layout, make sure that the direction of the warp thread (DN) on the patterns exactly matches the direction of the warp thread of the fabric. In this case, the product will stretch less and retain its shape longer during wear.
D.N. (shared thread) - designation of warp threads on patterns.
General layout requirements:
- The layout of patterns and chalking is performed on the wrong side of the material. The prepared details of the pattern are placed, strictly considering the direction of the warp threads and allowances for seam processing.
- For cutting paired symmetrical parts, the fabric is folded in half (fold, "face to face"), combining the edges. To prevent the fabric from shifting when cutting, it is cleaved along the edges with pins. If there are unpaired details in the cut, they are laid out on the fabric in an expanded form (reversed).
- First, the largest parts are laid out on the fabric (shelves, backs, sleeves, back and front panel of the skirt, etc.), all small parts (collar, selection, cuffs, facings, pockets, etc.) are placed in between them.
IMPORTANT! THE LAYOUT OF PATTERNS ON THE FABRIC IS PRODUCED TAKING INTO ACCOUNT THE DIRECTION OF THE HAIR, THE BOOT, THE PATTERN OF THE FABRIC AND THE DIRECTION OF THE BASIC THREAD.
On fabrics that do not have a fleece or pile, one-colored, striped and checked, with a symmetrical arrangement of stripes in the pattern, pattern details can be laid out in opposite directions.
- On fabrics with pile and pile, the details of the pattern are placed in one direction. This helps to avoid their different shades in the finished product. The direction of the pile is marked on the wrong side with arrows. In products made of long-pile fabrics, the pile should be directed from top to bottom.
- The pattern on the fabric can be one-sided and versatile. On fabrics with a directional pattern (especially large and rare), all the details of the pattern are laid out in one direction. On fabrics with a versatile pattern, patterns can be placed in opposite directions.
- Cutting the details of products made of striped fabric, the cage is performed taking into account the subsequent adjustment of the pattern during processing. The need to adjust this nature of the pattern entails additional fabric consumption, which must be taken into account when purchasing material. To adjust the fabric pattern when cutting out parts, allowances are provided in the amount of 1/2, 3/4 or the full step of the pattern.

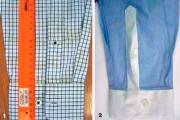
If the fabric has a plaid pattern, determine the type of plaid. It can be symmetrical or asymmetrical. In a symmetrical pattern, you can draw a line of symmetry, that is, a line that divides it into two equal parts so that each part is a mirror image of the other both in shape and color (Fig. 2, a). In an asymmetric figure, the line of symmetry cannot be drawn (Fig. 2, b).
When cutting fabrics with a symmetrical pattern in paired parts, it is necessary to achieve alignment of the pattern. In products made from fabrics with an asymmetric cell pattern, it is necessary to ensure that all the details of the pattern are located in the same direction, otherwise the pattern cannot be combined when stitching the sections.
Features of the layout and cutting of fabrics with a pattern in a cage, stripes
When laying out and cutting fabric products in a cage or strip, the following recommendations must be followed:
1. In paired details (shelves, parts of the back, sleeves, selections, etc.), the pattern of the fabric should be located symmetrically.
2. If there is a fastener, central seams, the pattern of the fabric should be combined. It is also necessary to match the pattern along the lines of the side seams.
3. On the product and sleeves there should be a single pattern location. When cutting the sleeves, the pattern along the collar is adjusted to the pattern of the front and back.
4. On the lapels and the ends of the collar, the pattern of the fabric should be symmetrical.
5. The pattern of the fabric on small details (flaps, patch pockets, leaflets, straps, belts, etc.) must be combined with the pattern of the main details of the product.
6. In double-seam sleeves, along the front seam of the upper and lower halves, there should be a combination of the fabric pattern.
7. When processing the upper darts on the shelf and darts from the shoulder sections of the back, the side of the tuck, located closer to the center, should maintain a shared direction, and the other side should be directed along the oblique thread.
8. When the tuck is located under the armhole (from the side cut), the fabric pattern, when the sides of the tuck are aligned, must be in a “herringbone” or must maintain a horizontal direction on one side of the tuck.
9. The sides of the tucks from the waist line are connected by a herringbone or keep the vertical direction of the pattern on one side of the tuck.
10. On all wedges of the skirt at the seams, the pattern of the fabric should coincide horizontally and expand equally downwards.
11. The sides of the darts (front, side and back) in skirts should form a herringbone pattern.
12. In the upper seams of one-piece sleeves, it is necessary to match the herringbone pattern.
13. The pattern of the cage along the bottom of the product must run horizontally.
14. The middle of the shelf and back should match the middle of the cage, strip.
Patterns of product details are usually given without seam allowances. When placing them on fabric, this should be taken into account. The amount of allowance depends on the method of processing sections and the type of fabric. They may be changed as needed. For example, if the fabric frays a lot, the seam allowances on all sections must be increased. 
General recommendations:
0.7-1.0 cm - the amount of allowances on closed sections (neckline, waist of the skirt under the belt, bottom of the sleeve under the cuff, collar sections);
1.5-2.0 cm - the size of the allowances on open sections (side and shoulder, embossed seams, longitudinal seams of the sleeves, yoke seams);
3.0-4.0 cm - allowances for hemming the bottom of the sleeve;
The width of the hem of the bottom of the skirt depends on its shape:
- for a straight skirt - 4.0-7.0 cm,
- extended - 3.0-4.0 cm,
- for a flared skirt - 1.0-2.0 cm.
In products with a cut-off waist line, the allowance along the waist line is 2.0-4.0 cm.
Chalking details
Having laid out the details of the patterns on the fabric, pin them with pins and proceed to chalking.
Patterns are outlined twice - along the contour of the part and taking into account seam allowances. For outline, use sharpened chalk or a bar of soap. The lines must be straight. The thickness of the lines should not exceed 0.1 cm.
Having circled the outline of the pattern, transfer tucks, folds, control points, model lines, pocket locations, mid-piece lines, half-slip, etc. to the fabric. Then proceed directly to cutting the fabric.
Cutting fabric
For the first fitting, only the main and large parts are cut out - the back, the shelf, sleeves, etc. Cuffs, collar, pockets, valves, etc. cut out of mock-up fabric or paper).
IMPORTANT! SMALL DETAILS ARE CUT FROM THE MAIN FABRIC ONLY AFTER ALL THE CLAIMIFICATIONS ARE TRANSFERRED TO THEM AND THE NECESSARY CHANGES DETECTED DURING THE TRICKING ARE MADE. LINING DETAILS ARE CUT ALSO AFTER TRYING IT ON.

- It is necessary to cut the fabric strictly according to the seam allowances.
- Lay the fabric flat on the table. The table should be placed in such a way that access to the material is, if possible, open from all sides.
- Smooth out all wrinkles and bubbles, if necessary - with an iron. Make sure that the warp and weft lines are exactly perpendicular to each other. Sometimes this needs to be taken care of especially if you are cutting, for example, chiffon.
- Take sharp scissors. Never use scissors that have previously been used to cut paper.
- Always make sure that the bottom blade of the scissors does not come off the table.
- When cutting slippery fabrics folded in half, care must be taken to ensure that there is no shift in the layers of fabric. For this purpose, it is recommended to fasten both layers with pins.
Interesting article! ((despite the irony with which tailor's tricks are presented)).
“No matter what anyone says, I still prepare the fabric for cutting according to my own, once and for all, developed rules. And, perhaps, that is why neither the fabrics nor the things sewn from them have ever let me down.
Rule 1. Any fabric, except for leather and suede, MUST be washed. Natural silk, for example, or linen - practically in boiling water, wool, even coat drape - in water at a temperature of about 35 degrees. Ideally, you need to "clean" it all in washing machine in quick wash mode. There are three consequences that are established as a result of this seemingly thoughtless act:
(1) the fabric gives maximum shrinkage and will no longer shrink, so the item can be washed at home, which I have been successfully doing for more than a year; (2) you are convinced that the fabrics declared as natural are really natural, since real silk is not even afraid of boiling, only without bleach, of course, like linen, and when ironed, it will smooth out a hundred pounds; (3) natural molting of the fabric occurs, thereby reducing the risk of molting and mutual repainting of things when washing together.
Rule 2. Do not spare SOAP when cutting thin fabrics.
When natural silk, and especially chiffon or satin, has already been "planted" in accordance with Rule 1 and has not yet dried, they need to be lathered thickly, very thickly - as when soaping a patient with pediculosis. The more soap settles on the fabric, the easier it will be for you. I squeeze the moisture out of the fabric with my hands and lay it out on an old thick blanket, spread right on the floor, folded in half as necessary when cutting and let it dry. I smooth it with an iron and get ... almost a sheet of tissue paper. Soap acts like a temporary starch, only much better than the impregnation of the fabric, which was contained in the unwashed fabric.
With wool, such tricks are not necessary, of course, but if they are thin, you can try. Strangely enough, this soap starch does not interfere with trying on, but the sections do not crumble, the pins do not slip, the fabric does not crawl when laying out patterns and cutting out, although it is folded with slippery sides to each other (especially natural silk satin). And when you wash the finished thing, it suddenly appears so suddenly beautiful, and there are no soap stains, even ironed ones.
Rule 3. Only hard cellophane for patterns. In order for the patterns not to infuriate you, they must be easy to use. I hate tracing paper for rustling alone, I generally keep quiet about its "coagulability". I go to the store for gardeners, buy 3-4 meters of five-micron film for greenhouses and take patterns from magazines with a simple ballpoint pen. BEAUTY! Such patterns are stored much longer and better than all the others, because of their transparency, the fabric is clearly visible and it is very convenient to manipulate them on the canvas, they do not tear and all that.
Rule 4. Draw on the fabric with felt-tip pens. No need to fall into ommorok!!! I know what I'm talking about! Buy Crayola brand washable felt-tip pens, special for children, environmentally friendly, they are erased even if you iron the drawn line with a steam iron.
Rule 5. Better: chic fabric + simple cut = one good thing than a bunch of cheap rags with pattern frills. Well, this is already from the field of philosophy of taste, but I cannot but say.
With wishes of creative success to all tailors.
I completely agree with the authors of the tips, otherwise I would not have published. I think these valuable tips from practicing dressmakers can be useful not only for beginner sewing enthusiasts, but also for those who are going to buy fabric for the next order.
Forum "Osinka"
"When processing fabrics, impregnation is used - a dressing that is applied when passing through a calender mechanism - a bunch of shafts, where the fabric is successively passed through, impregnated, stretched, ironed. Sometimes stretching is in excess of the norm - so that the output of the fabric by the meter is greater. The fabric also passes through the expansion mechanism, where it is stretched across.
After such treatments, the area of \u200b\u200bthe fabric increases - here's the savings for you !!!
But in the process of decating (processing the fabric before cutting), the fabric can be skewed - as if weft and share are no longer at right angles, but become a parallelogram, and the sizing, such as starch and PVA glue (also used), holds these threads, preventing them from returning back to normal.
So that the fabric does not warp after decating, it is necessary to fold the cut along the lengthwise and align the edges, lay a seam along the edge with large basting stitches. And then wash and dry.
In the store, such a fabric is cut at a right angle to the edge and, accordingly, at an angle of, say, 15 degrees to the weft thread. Naturally, after soaking, when the sizing is partially washed off, the threads return to their place. Immediately, all the flaws in cutting with scissors by the seller in the store become apparent. You have to level and cut off up to 15 cm wedge on each side.
Therefore, I never take the fabric if it is not torn, when possible, or make me measure from the short end of the edge and then tear off, so that after trimming the cut, I do not suffer to the smaller side. Sellers crap from my, from their point of view, idiocy, but I set my own conditions - either tear or go to another seller!
Most often, curtain organza suffers from improper trimming, which is impudently cut at an angle. And then poor people bring me, and I ruthlessly straighten it, pulling out the thread, and cut it, and the skew can be up to 50 cm. Therefore, be careful when buying !!!"
**************************
"Silk fabric usually has an extra layer of paint on the surface, so it's best to wash it before use. The best way pre-washing silk fabric is as follows: place the fabric (with the exception of suit silk) in a bath with plenty of water. Water should be at room temperature. Add a quarter cup of white vinegar to it to preserve the color of the fabric. Leave the cloth in the water for one hour, then shake off the water. Rinse the cloth in water at room temperature.
Do not wring silk fabric. Squeeze water out of it lightly and dry it on a towel. Iron silk fabrics slightly damp on the reverse side."
******************************
"If the fabric is made and dyed with high quality, and not handicraft, then it must withstand with honor all the executions - washing, drying, squeezing, etc., like ordinary colored natural fabrics. That is, the temperature is 30-40 degrees, detergents for colored linen. In principle, batik went through all the vile procedures in the manufacturing process.
You can test it for stickiness by wetting a small area of fabric and rubbing it with a white cloth. If the rag completely loses its whiteness, then the production is handicraft, and there is no quality of painting. This means that what you sew from the fabric will be a disposable product.
I try to be careful with such delicate fabrics - wash only in cold water, using gentle detergents. Vinegar fixes color, reduces stickiness.
Decating fabric is a wet-heat treatment of the material before cutting.
The fact is that all fabrics containing natural fibers by 50% or more, during wet-heat treatment, give a fairly significant irreversible shrinkage, which entails a change in size and distortion of the shape of clothing when worn or after washing.
Before decanting, it is necessary to check on a small piece of fabric whether there are stains from water and iron on it, as well as the durability of the dye - on fabrics with a printed pattern.
The decanting process is different for different fabrics.
wool fabric lay flat on a table or ironing board, face down. Moisten it as evenly as possible from the wrong side (for this it is better to use a spray bottle), and then let it lie down for 8-12 hours. After that, iron from the inside out in the shared direction through the iron.
Heavy, crepe fabrics before cutting, it should be completely soaked in water, slightly wrung out and hung up for a while, and then finally dried with an iron, ironing from the wrong side.
Cotton, linen and blended fabrics Moisten with a spray bottle and iron from the wrong side until the fabric is dry.
staple fabric shrinks a lot when washed. Therefore, it must be soaked in hot water, squeezed out, and then dried with an iron from the wrong side.
Natural silk fabrics have slight shrinkage. It is enough to iron them through a damp iron, combining the share thread.
Synthetic fiber fabrics. Suit and dress fabrics with a synthetic fiber content of more than 50% shrink insignificantly, and therefore do not need to be decoated.
Particular attention should be paid to viscose and denim fabrics. Although viscose this is an artificial fiber, it is also subject to shrinkage, and very significant. Therefore, viscose fabrics must be decaged.
Denim shrinks when washed and stretches back when worn. This fabric should not be decaged, as otherwise you will receive a product that is not your size.
Some fabrics cannot be moistened (velvet, velveteen, synthetic knitwear, leather, leather substitutes). So that the fabric does not shed and better retains its original luster, it can be soaked in water with the addition of vinegar (for 3 liters of cold water, 1 tablespoon of vinegar).
If you know for sure that in the process of wearing you will not wash the product you have sewn, but will use dry cleaning services, you can refuse to decate the fabric and only iron it from the inside with a hot iron, while observing the recommendations for heat treatment of this type of fabric.
Sections: Technology
Topic of the module: ""Design and manufacture of garments"".
Topic of the section: "" Technology of processing of the shoulder product "".
Didactic rationale for the lesson.
Lesson Objectives:
- educational -
- to acquaint students with various ways of arranging the details of a paper pattern on fabric;
- teach students the most economical way to decompose parts; improve the skills of cutting symmetrical parts of the product, taking into account the properties, colors and pattern of the fabric;
- developing - to develop logical thinking, coordination of hand movements, design and performance skills;
- educational - to educate aesthetic taste, attentiveness, instill the skills of a culture of work and accuracy;
- vocational guidance - to generalize knowledge about the field of work, professions, career.
Methodological equipment of the lesson:
Material and technical base:
- technology room;
- iron, ironing board;
- centimeter tape, fabric scissors, pins, needles, square, rulers, chalk or soap;
- fabric for cutting.
- video "Open the nightgown"
Didactic support:
- textbooks: "Technology - 7 cells." V.D. Simonenko; "Technology of fabric processing 7-9 cells." VN Chernyakova.
- workbook;
- album;
- additional literature - "Dictionary of a fashion designer";
- poster "" Laying out the details of the pattern on the fabric "";
- educational and technical documentation:
- technological maps;
- instruction cards;
- instructional-technological cards;
- information cards;
- object of labor: nightgown, sundress, dressing gown;
- samples of knotted processing: processing of the neck, processing of the lower cut of the sleeve, processing of seams in an open and closed stitch;
- materials to control students' knowledge:
- task cards;
- tests;
- Crosswords.
Teaching methods: explanatory-visual, partially exploratory: explanation with practical reinforcement, introductory briefing and practical work.
Forms of organization of cognitive activity of students:
- frontal;
- individual.
Lesson type: combined.
Interdisciplinary connections: botany - the importance of plants and conifers in human life; technology 5 cells. - types of fibers, fabric structure.
On the blackboard: undercut and one-piece collar, clasp, loop, duplication of parts, adhesive pad.
Dictionary of fashion: selection - a detail of the product intended for processing the board, cut out according to its shape; frills - strips of fabric of various lengths and widths, cut in a straight line, gathered on one side.
Literature for the teacher.
- Sample programs for educational field"Technology" V.D.Simonenko - 2000
- Technology - Grade 7 - V.D. Simonenko - 2000
- Fabric processing technology -7 -9 cells. V.N. Chernyakov -1999
- Labor training - 7 cells.
- Literature for extracurricular reading of students
- You and your profession - M.A. Bendyukov.
During the classes
Organizing time:
- greetings;
- checking student attendance;
- filling in a classroom journal by a teacher;
- checking work clothes and readiness of students for the lesson;
- prepare students for work;
- communicate the lesson plan to the students.
2. Checking students' homework:
1. Check the requirements for preparing the pattern, the norms for adding seam allowances.
2. Check the safety regulations for working with sharp and cutting tools.
3. Actualization of students' knowledge:
3.1 Checking knowledge of the material of past lessons on task cards.

| 1 | 2 | |||||||||||||||||||
| 4 | 3 | |||||||||||||||||||
| 4 | ||||||||||||||||||||
| 5 | 6 | |||||||||||||||||||
| 5 | ||||||||||||||||||||
| 6 | 7 | |||||||||||||||||||
| 7 | 9 | 8 | 8 | |||||||||||||||||
| 9 | ||||||||||||||||||||

4. Presentation of new material.
Communication of informative information.
Before cutting the product, it is necessary to prepare the fabric for cutting.
Many fabrics have the property of shrinkage. So that the product does not lose its original shape and size during wear, the fabric should prodecate.
Woolen fabrics (dress fabrics) are usually decanted through a damp iron (a piece of dense fabric, preferably linen) in the shared direction. In this case, you should not drive the iron for a long time, as the fabric can become the most rigid. The fabric is then allowed to cool and dry.
Single-sided woolen and crepe fabrics are moistened by regular spraying or spraying. Wrapped in a sheet and left for several hours, after which the fabric is ironed with a not very hot iron from the inside along the shared thread.
Staple fabrics and artificial silks are best dipped in slightly warm salted water for 15 minutes, starched, gently squeezed out without twisting, then wrapped in a sheet for 2-3 hours. Iron the fabric from the wrong side, with a not very hot iron.
Cotton fabric is moistened in warm water, wrung out, dried and ironed.
It should be remembered that some fabrics (wool, velvet, synthetic) cannot be moistened, as stains or wrinkles remain on them, which do not disappear even after ironing. Therefore, before decating the fabric, it is necessary to check on a piece how it reacts to moisture.
Preparing fabric for cutting.
- Determine the fiber content of a fabric.
- Decat the fabric to prevent subsequent shrinkage.
- Determine the direction of the grain thread on the fabric, the front and back sides, the direction of the fabric pattern and its nature, in order to take all this into account when laying out the patterns. Check for defects.
- Iron the fabric.
- Bend the fabric along the shared thread in the middle with the front side inward, equalizing the pattern, chop off.
- Align the cross section of the fabric with a square.
Laying out pattern pieces on fabric.
When laying out patterns, it is necessary to take into account some properties of the fabric. It is easier to cut out from hard, elastic fabrics than from light, loose and sliding ones. When laying out, pay special attention to fabrics with a one-sided direction of the pattern. Here it is necessary to ensure that on all the details of the product the pattern is directed in one direction. In pile fabrics, the direction of the pile and shade are checked. When cutting from velveteen and velvet, the details of the patterns are laid out sequentially in the direction of the pile from the bottom up.
When cutting products from flannel or baize, place the details of the patterns in the direction of the pile from top to bottom, then while wearing the pile will not rise. On fabrics with stripes and a cage, arrange the details of the patterns so that at the junctions of the details (at the seams) the strip or cage matches in color, width and runs exactly in the middle of the front and back.
In terms of size, cells in tissues can be small, medium and large. In addition to size, they differ in color, size of squares, width and order of alternation of stripes. If in the drawing of a tissue cell one can find a midline that divides the cell into two equal parts in all directions, such a checkered tissue is called symmetrical.
When cutting, the line of symmetry must be aligned with the middle line of the pattern.
- The layout of patterns on the fabric is carried out in two ways:
in the fold - the fabric is folded in half along the length with the front side inward;
in turn - the fabric is turned in width. - Lay out large parts on the fabric, starting from the shelf, stepping back from the cut by the amount of the seam allowance.
- Patterns on fabric with a directional pattern should be in the same direction. If the fabric has a large pattern, it is necessary that the right and left side were symmetrical in the drawing (see Fig.50, p.127).
- The direction of the warp threads on the pattern should match the direction on the fabric.
- Pattern details are arranged so that the layout is economical.
- The lines along which the cutting will be made and the control points are drawn with sharpened chalk or soap.
- Cut out the details of the product along the lines of the seam allowances.
- For the first fitting, cut out only large main parts.
- Small details are recommended to be cut after the clarifications.
Consolidation of students' knowledge.
Make a layout on graph paper in m 1: 4. Mutual control.
Having chosen a rational layout of patterns, students begin practical work.
Fizkultminutka.
Practical work ""Layout of patterns of parts on fabric and cutting"".
Induction training:
Exercise 1.
To study the technology of preparing fabric for cutting.
Task 2.
Prepare fabric for cutting.
Task 3.
Lay out the pattern pieces on the fabric.
Control.
- Are the patterns on the fabric correctly positioned according to the pattern?
- Does the direction of the shared thread on the fabric coincide with its designation on the pattern?
- Are the details correct? Are all control points marked on the fabric?
- Are allowances correct?
Task 4.
Make a cut.
Control.
- Are all cut details in stock?
- Whether control points are applied along the waistline.
- Are the seam allowances even?
- Whether the direction of the lobar thread of the fabric is indicated.
- familiarization with educational and technical documentation.
- warning about possible difficulties;
- safety briefing when working with scissors, pins.
6.2. Independent work of students on UTD.
6.3. The current instruction of the teacher (conducted in the course of the students' independent work):
6.3.1. Formation of new skills:
- checking the organization of the beginning of the work of students;
- checking the organization of students' workplaces (desktop, tools, fixtures);
- compliance with the rules of safety, sanitation and occupational health in the performance of the task;
Assimilation of new knowledge.
- verification of the correct use of the use of educational and technical documentation by students;
- instructions on how to complete the task in accordance with the technological documentation.
Target visits to student workplaces:
- First round: instructing students to perform individual operations and tasks;
- The second bypass: focusing students' attention on the most effective methods of performing operations;
- Third bypass: check the correctness of self-control.
- Fourth round: check for correct compliance specifications at work. Perform acceptance and appraisal of work.
Give additional work to the most successful students.
Final briefing.
7.1. Consolidation of the studied material.
a) the task of choosing the correct sequence.
b) test: Open.

7.2. Summing up the work - a message about the achievement of the objectives of the lesson.
- Objective evaluation of the results of the collective and individual work of students in the classroom;
provide an assessment of the quality of work of each student;
put marks in the journal and diaries of students. - Mark which of the students achieved excellent quality of work.
- To analyze the most characteristic shortcomings in the work of students.
- Message about the topic of the next lesson:
preparation of cut details for processing;
preparation of the product for the first fitting. - Assignment for students to prepare for the next lesson:
a) read No. 22 pp. 126-129, answer the questions.
b) Bring: a cut, sewing needles, tailor's pins, chalk or soap, white thread, an album with stitch patterns (copy stitches).
c) repeat the technology of processing the cut with copy stitches.
Project:
- Make sketches of cut details in design sheets.
- Draw a layout plan for the patterns on the fabric.
8. Cleaning jobs.
The fabric is an interlacing of equity threads (main) running along the edge, and transverse (weft) threads. The direction of the thread in the fabric can be determined by stretching and by sound: the fabric is more difficult to stretch along the lobar thread, and when the fabric is twitched along the lobar thread, the sound will be more distinct, and the sound will be muffled along the transverse thread.
There are a lot of weaving patterns, but there are three main ones: linen, satin (satin) and twill.
In plain weave, the warp threads alternate with the weft threads, so the surface of the fabric is smooth, matte, the same on the front and back sides.
In plain weave printed fabrics, the front side is determined by the brightness and clarity of the pattern, and in plain-dyed fabrics - by the quality of processing (there are fewer knots and villi on the front side). Plain weave produces: most cotton fabrics - chintz, calico, linen and some dress fabrics; linen fabrics - linen, cushioning; many types of silk fabrics - crepe de chine, crepe georgette, linen, etc.; some woolen dress and suit fabrics.
In satin (satin) weave, the front side of the fabric, in contrast to the wrong side, is smooth and shiny. Glitter is formed as a result of the fact that one weft thread overlaps 4-8 warp threads. If one warp thread overlaps several weft threads, then this weave is called satin.
Satin weave produces such fabrics as satin, satin, crepe-satin, lining and some others.
In a twill weave, weaves form on the fabric in the form of diagonal stripes running from one edge to the other. On the front side of the fabric, diagonal stripes are directed from bottom to top to the right. Twill weave produces: cotton fabrics - bumazeya, tights, twill, paper cashmere, etc.; woolen - cashmere, boston, gabardine, etc.: silk - lining, a number of dresses, raincoats.
When cutting, it is necessary to take into account the properties of the fabric: chop off the sliding one with pins, and if it is loose, increase the allowance for seams and stocks and be sure to overcast the cuts - the cut edges of the parts. From wrinkled fabrics and fabrics with a loose weave of threads, it is not recommended to sew tightly fitting products. Products from fabrics of increased extensibility should be made on a lining.
In order for the finished product to retain its size and not deform when worn, the fabric must be decatered before cutting, i.e. treat with water vapor. To do this, wet the cotton fabric in a small amount of warm water with the addition of vinegar or salt, without squeezing, dry and iron from the wrong side; soak the linen fabric for a short time in hot water, dry and iron on the front side; soak a fabric made of artificial fiber in slightly warm water with the addition of vinegar, wring it out slightly and roll it into a dry sheet, and then iron it from the inside while still wet; roll a woolen or silk fabric tightly into a damp, well-wrung out sheet and leave it in this position for 5-8 hours or hold the fabric over hot steam, and then iron it from the wrong side with a hot iron through an iron.
In all these cases, iron any fabric only along the shared thread. After decathing, the fabric should dry completely. Very thin fabrics can be ironed with a hot iron through a moistened ironing iron without pre-moistening them.
At the cut edge of the fabric intended for sewing the product, pull out the transverse thread (weft) and align the edge along it. If the fabric is skewed, moisten it and pull in the desired direction, and then iron along the shared thread.
The consumption of fabric for the product depends on the model and size of the figure. The more complex the model, the greater the fabric consumption. TO complex elements models include wide skirts, raglan and one-piece sleeves, draperies, figured undercuts, reliefs, coquettes, collars, pockets, inlays, flounces, frills, frills, molds, etc. It is necessary to take into account the width of the fabric, the direction of the pile and the pattern, as the fit the pattern will require additional fabric along the length, regardless of its width, and the percentage of shrinkage (mainly along the longitudinal thread) depends on the fibrous composition of the fabric, averaging for: cotton fabric 3-5%, woolen and semi-woolen 3-4%, natural silk 2-3%, rayon 4-8%, staple fabric 4-6%. Synthetic fabrics practically do not shrink.
To determine the consumption of fabric, mark its width on a sheet of paper and lay out the details of the pattern of the product, taking into account the direction of the grain thread indicated on the details, allowances for seams and stocks, fitting the pattern and shrinkage of the fabric.
For cutting, fold the fabric in half along the transverse thread (along the weft) or along the shared (warp) side inward, depending on the width of the fabric and the characteristics of the model, adjusting the pattern. First, place the large details of the pattern (back, shelf, etc.), and then between them - small ones, strictly following the coincidence of the direction of the grain thread on the fabric and on the details of the pattern (Figure 18). This is important because, as already noted, the fabric along the longitudinal thread stretches much less during wear, shrinks less during washing, dry cleaning and ironing than along the transverse thread. The direction of the shared thread on the details varies depending on the model - they can also be cut along a transverse, oblique thread. Having laid out the details, check with a ruler or centimeter tape the correct layout of the pattern details along the shared thread.
On plain-dyed fabrics or with an indistinct pattern, for economical cutting, pattern parts can be laid out in different directions, observing the direction of the grain thread and the distance for seam allowances. On the rest of the fabrics, place the details with the upper cut in one direction (except for facings). On pile fabrics or with a clearly defined one-sided pattern, with an asymmetric cage or stripe, mark the direction of the pattern or pile on the wrong side with a chalk arrow and make sure that it is not disturbed when laying out the details of the pattern. In finished products made of flannel, baize, cotton suede, the pile should be directed from top to bottom, so that when worn, a smooth surface of the fabric is maintained, and in products made of velvet, panne velvet, velveteen - from bottom to top, so that the color of the fabric is more juicy. Also mark the detected fabric defects with chalk and place the parts so that the defect is not in a visible place of the product or the fabric area with the defect does not fall under the pattern when cutting.
When laying out the details of the pattern on fabrics with a large, clearly defined pattern, you need to take into account that it must be combined in the side, front and back seams, and also determine the pattern (check or strip) that is most suitable for placing the middle of the product details (back. shelves, sleeves, etc.). In addition, it is necessary to monitor the coincidence of the pattern in paired parts, tucks, etc. Sometimes, in order to save fabric, it is possible to cut out parts with wedges or extensions, placing them in inconspicuous places: the lower halves of the sleeves or shelves at the side seams, on the lower collar, facings, selections below the lapel line, on the belt at the side seam. If extensions have to be made in prominent places, then they should be used as fittings. For example, the back can be made in two parts with a seam in the middle or in three parts on the yoke. Details such as the lower parts of the collar, cuffs, leaflets, facings for the neck and bottom of the sleeves should be hemmed so that the direction of the grain thread on these details, as well as on the main ones, coincides.
Having placed all the details of the pattern on the fabric, pin them with pins, circle the contour, shaped lines and control marks with finely sharpened tailor's chalk or a dry bar of soap (soap does not crumble and does not stain the fabric during work, the soap trace quickly disappears under a hot iron). Give allowances for seams: 0.7 cm along the sprout and neck, 1.5-3 cm along the shoulder and side sections, 1-1.5 cm along the armhole, 3-4 cm along the waist, 3-8 cm along the bottom of the product, 1-1.5 cm along the sleeve hem, 2-3 cm along the back and front sections of the sleeve, 0.7 cm along the bottom of the sleeve. ). Place parts that are not cut in the middle (back, front, collar, etc.) on the fabric so that their middle runs along its fold.
After trimming, remove the details of the pattern and, so that the fabric does not move, fasten it with pins. Place the pins on the details of the product at a distance of 3-5 cm from the chalk lines or the fold of the details. The distance between the pins is 12-15 cm in straight sections and lines and 8-10 cm in curly ones (Figure 1b, c).
If there are seams in the middle of the back or front, then sweep the details with running stitches, and lay snares along the contour, shaped lines and control marks, clearly marking the corners and roundings. Along these lines, the product will be swept and then sewn on the machine. Mark the middle of the solid parts (back, front, skirt panels) with interlining stitches. When cutting parts with asymmetric elements, lay the fabric on the table unfolded face up, place the parts on the fabric also face up. Circle the contour and shaped lines with chalk, and then lay running stitches with a thin thread: 2-3 cm on straight sections, 1-2 cm on curly sections, 0.5-1 cm on curves.
When cutting the fabric, do not move it and do not lift the details of the cut. The part should be located to the right of the scissors, and the cut fabric should be held with your left hand. Do not cut darts on the details.
When cutting in a straight line, it is necessary to ensure that the ends of the scissors move strictly along the chalky line of the seam allowance, and try to cut with the middle of the cutting part of the scissors. When cutting along smooth lines, on the contrary, it is necessary to cut with the ends of the scissors. The narrow end of the blade should be under the fabric. The exception is lace fabrics, as the narrow end of the scissors can get into the pattern and deform it. It is convenient to cut with scissors from yourself straight or from yourself to the left.

