Star News


Felt figurines for Halloween. What toys to make for Halloween. Halloween crafts from toilet paper rolls
Halloween is approaching - a holiday of various wickedness, vampires, witches and ghosts. In our country, it became known relatively recently, but every year it becomes more and more famous and its celebration is gaining popularity. Halloween dates back to ancient times, when the Celtic tribes these days celebrated the end of summer and the beginning of winter on this night. It was on the night of October 31 to November 1, according to their beliefs, that the gates to the world of the dead opened and its inhabitants could enter the world of the living. To scare away wickedness, people dressed up in scary costumes and locked up at home, they gathered around the fires for celebrations. At the end of the celebrations, each family took a light from the fire and placed it in a pumpkin lamp, this lamp served as a talisman at home. with the adoption of Christianity, the original meaning was forgotten and replaced with the more familiar Halloween - All Saints' Day. 
Halloween paraphernalia has now become quite fashionable, and its variety is expanding every year. Masquerade costumes, masks, pumpkins, decorative ornaments are sold in stores, but needlewomen also liked this holiday with its paraphernalia. Moreover, various gifts of autumn are often used for its symbolism.
Today we will show examples of various scary toys made from felt or fleece. With these funny and cute scary stories, you can decorate your house for Halloween. 


The most common toys are in the form of a pumpkin - the main symbols of Halloween, bats, witches and their accessories (caps, brooms, cauldrons for potion), owls, vampires and skeletons. The most common colors in the symbolism of this holiday are orange. black and purple.
We will sew toys from felt - the most suitable material for needlework. It keeps its shape remarkably, is quite dense, comes in various colors and, thanks to its structure, looks cozy and warm. 


We randomly cut out the contours of the future toy from cardboard, cut out two blanks from the material along it. After stitching them with a regular seam over the edge, we stuff the toy with padding polyester or cotton wool. For different parts of the toy, you can use different colors of felt, which will give the toy brightness. Eyes, decorations are easily attached with glue.
Halloween - interesting topic to introduce children to the English-speaking culture. It is quite difficult to explain the features of this holiday outside of the English-speaking culture, it is too unusual for us. And through the game and toys it turns out very interesting for little polyglots.
Felt toys are easy to sew, and with patterns it will be very easy to do. It is enough to cut out all the details and connect them together, focusing on the photos and explanations below.
There are 6 felt toys in this finger theatre: two ghosts, a bat, a pumpkin, a witch's hat and a castle - traditional halloween attributes.

The ghosts are sewn from felt, the eyes are glued on, and the mouth is simply cut out. When the toy is on the finger, an interesting effect is obtained due to the translucent finger or the void between the layers of felt.

For the castle you will need three parts: two black and one yellow. We connect the yellow part with the front part of the lock so that light appears in the cut windows and doors. Pumpkin is made in the same technique.

Toys make up an interesting composition and plot on the hand.

Some toys can be worn not only on the finger, but also on another toy. It turns out that the ghost flies out of the window of the castle.
A pumpkin or a ghost is trying on a witch's hat.
Using the same patterns, you can assemble garlands to decorate a room, make paper applications.

On the theme of Halloween, the site has already collected a collection of games and toys.
Making a funny Halloween souvenir or just a toy and interior decoration is not difficult at all. I suggest you sew a felt toy with your own hands in the form of a vampire bat, using my pattern and detailed tips. In addition, he turned out to be completely fearless!

Materials and tools for sewing a vampire
- 2 sheets of black felt (A4 format)
- white or beige felt for decoration, pink - for the heart
- sintepuh or synthetic winterizer for stuffing
- thick threads like "iris"
- summer, braid and beads for decoration
- scissors, needle, glue, pencil, paper

We sew a toy from felt with our own hands
Why Felt? This material has a wide color palette and is very convenient in working on toys and accessories. It does not crumble at the edges, holds its shape well and is easy to cut.
Print the pattern on the printer (its actual dimensions just correspond to a standard sheet of A4 paper) or redraw it by simply attaching the paper to the screen. Size finished toy should be about 15 cm.

We pin the template onto the material with pins or circle it with a chalk or wax pencil. Remember that the abdomen, eyes and heart must be cut out of felt of other colors. If you want the figure to be bigger, leave a processing allowance of about 1 cm.

When all the details are cut out, we begin to sew them together. Of course, this can also be done on a sewing machine, but the manual version will look more decorative and, thanks to deliberate negligence, will be more suitable for Halloween style.
We connect the details of the wings to each other (if you make them from one layer of thin felt, they will not hold their shape well and will quickly fray at the tips). I connected them without any filler inside, however, for a larger volume, you can add a small insert from a padding polyester. We sew the wings in a circle with a small overcasting seam using a thick black thread.

When the wings are ready, proceed to the design of the front of the toy. I suggest using thick threads like "iris" for this and deliberately careless stitches aimed at different sides. They look decorative and create a peculiar effect of patches on the figure.
Advice: some small details, for example, eyes, can be glued a little with fabric glue or transparent Moment-Crystal.
With the most accurate parallel stitches, we outline only the direction of the gaze and embroider a smile on the vampire.

When all the details have taken their place, you can sew the parts of the torso, having previously secured the parts with pins and precisely aligning the edges. Overlock stitching is also good for joining.

We start sewing on the side or in the area of \u200b\u200bthe paws to hide all possible knots. Having reached the head, do not forget to sew in a braid or ribbon so that the toy can be hung, for example, on a window or even in a car.
Advice: if you put ground cinnamon, cloves or vanilla inside the felt figure, the toy will turn into a real fragrant sachet!
When the vampire is almost completely stitched, we carefully fill it with stuffing, straightening it with a pencil so that there are no voids in the ears or paws.

We finish the figure and carefully fasten the thread. The wings could be sewn to the back while the toy was not yet ready, but if you fasten them over, you can better find the right position and make a slight tightening of the fabric, which will add extra volume. We fix the wings and sew them with a simple running stitch, tightly tightening the thread.

A positive felt bat is ready, it remains only to find a suitable place for it in the house or present it as a gift!
Approaching very interesting holiday- Halloween day. You have decided to celebrate this event, but do not know how to make it more enchanting. Try making holiday paraphernalia in the form of felt vampires, which will help you feel the bright and unusual atmosphere of this celebration. Also, these cute figurines can be presented as a gift for a loved one.
If you do not know how to make a similar Halloween felt souvenir with your own hands, then this article will help you. Use the pattern and tips for making it below, and you can easily make an absolutely fearless vampire bat.
To work on this funny souvenir, we will need a few black sheets of felt, in addition to this, we will need beige (white) and pink felt for decoration. For stuffing, you need to choose a special material (synthetic winterizer or synthetic winterizer will be very useful), thick threads (not bad if they are in a contrasting color), additional elements in the form of beads, ribbons, braids, etc. will be needed for decoration. Don't forget to prepare various tools that are always needed when sewing.
For work, we have chosen the most optimal and versatile material - this is felt. It has a variety of colors and is quite convenient in the manufacture various crafts. Additional advantages of felt are that it does not tend to crumble at the edges, it is quite convenient when cutting and retains its shape for a long time.
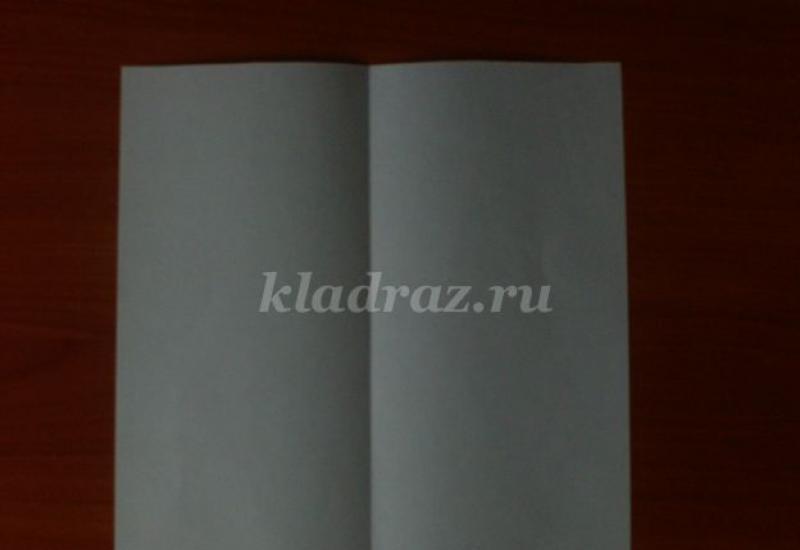
Before you is a diagram of a pattern for a toy. Transfer it to paper, adjusting its dimensions in accordance with the desired size of the future bat. Cut out all the details from paper.
Transfer the pattern to the material. You can pin the template with pins or trace around it using crayon or wax crayon.
Consider the fact that the belly, details of the muzzle and heart should be cut out of felt of other colors. Also, don't forget about the seam allowances.

When all the details are ready, start sewing them together. You can do this job with a sewing machine, but if you do all the seams by hand, the toy will look more original and just right for Halloween.
Initially, you should stop at the wings of the mouse. They can be made from one part, but in this case they will not store the shape. Connect the two parts of the wings with an overcast seam. If desired, a small piece of synthetic winterizer can be inserted inside.
When decorating the details of the face, use a thread of the “iris” type. Sew messy stitches in different directions. So we can give our toy decorative look. Take note that small details in the form of an eye can be glued.
With the help of neat parallel stitches, decorate the pupils of the vampire and his smile.
When all the pieces are glued and sewn into place, you can sew all the parts of the torso together using an overlock stitch. For convenience, secure them with pins. Having reached the middle of the head of the toy, do not forget to sew a hook from the tape. So the bat can be hung on the window or in any other place.

When the toy is almost completely sewn, fill it with stuffing material. For convenience, you can use a pencil or something similar. You can easily fill all the voids in the area of \u200b\u200bthe ears and paws with stuffing. In addition, you can additionally fill the toy with cinnamon and vanilla, which will give it a special unique flavor.
Now it remains to sew our vampire and firmly fix the thread. Wings you can sew after the whole toy is ready. This work can be done earlier, when all the details are not yet sewn together. Give extra volume to the wings by making a slight tightening of the fabric.

This is how we managed to make a cute bat for Halloween. It remains to choose a suitable place for it or present it as a souvenir.

Web and spiders with their own hands
A spider web is a simple and effective decoration for a Halloween room, especially if you are planning a party with guests and you need to create the right atmosphere.
The most obvious option is to wind woolen threads on the wall in the form of a web, fixing them with pushpins. First you need to fix the warp threads (diagonal), and then wind the thread in a circle.

You can fix the thread-web on a plastic disposable plate, populate it with a cardboard spider and hang it on a chandelier.

The basis for the web can be the crosshair of any sticks, for example, thin branches or ice cream sticks.


The web can be cut out of paper or oilcloth according to the same principle as a snowflake for the New Year.

Spiders for Halloween as a web decoration or as an independent decor, you can either buy ready-made or do your own crafts. It can be just a figure cut out of cardboard or a three-dimensional version.
These cute spiders can be obtained from the same plastic plates. Of the materials you will need chenille (fluffy handmade wire) and eyes for toys of different sizes.

But such a not only funny, but also tasty spider can be made from lollipop and chenille:

More complicated in execution is a glamorous spider made of decorative mesh, designed in the form of a bubo.

Here you can make such a cute spider with your own hands from two foam balls different size.


And another version of the balloon spider, this time wrapped with acrylic thread.

A very simple to create, but spectacular looking spider is made of a black ball with paper paws. It may well frighten the guest who entered the room!

Halloween crafts from toilet paper rolls
Rolls (tubes) remaining after use toilet paper- excellent material for children's creativity. From it you can make figures of any animals and birds, but for Halloween - monsters, mummies and bats.

To create such mummies, nothing but toilet paper and a peephole will be needed. Wrap the roll with paper in random order, glue the eyes - the mummy is ready!


As for the creation of monsters, here you can show your imagination with might and main.


The same applies to making witches, ghosts and bats - no instructions are needed to make them.


Well, if you don’t have extra rolls lying around at home or there isn’t enough material to realize all your fantasies, use empty juice boxes as an alternative.

Candlesticks
An original decoration of the Halloween room decor will be a craft in the form of a candlestick. Making it is not as difficult as it might seem at first glance.

Take a glass container (jar) and stick thematic figures cut out of paper (witch, bat, pumpkin, spider, cobweb, etc.) on the outside. Place a candle at the bottom of the jar, light it - the lamp will light up spectacularly.


The drawing can also be applied with a marker, and the container can be painted with any color - then the lamps will light up in different shades and look monstrously gorgeous in a dark room. Boouu!


You can wrap the jar with gauze and glue the eyes - you get a mummy lamp.

Wrap the cans with thread and plant spiders on them - we are back to the topic of the web again.

Fairy lights
Option crafts for the holiday, representing unlimited scope for imagination. After all, you can hang anything on a garland!
Paper ghosts.

Skeletons, black cats and bats.


Skulls and ghosts made of felt.


Faces of monsters and witches.

Balls made of thread in the form of "sugar heads".

Paper pumpkins.

Thread ghosts.

Or fabric.

Halloween wreath
A wreath on a door or wall is a very popular home decoration. Now such wreaths are made for many holidays - and Halloween is no exception. As a blank, you can use a circle made of cardboard, plywood or a foam circle - they are sold in needlework stores.
These funny monsters can be made if many strips of tulle are tightly knotted on the workpiece.